Configuring Harxon HX-DU8608D radio
Configuring the HX-DU8608D to transmit RTCM corrections to a rover
Once the base station is configured to use an external radio you can configure the Harxon external radio using the included configuration software. Connect the radio to your computer using a 9-pin serial port to USB cable and the 5-pin lemo to 9-pin serial cable included with your radio. Connect the power supply end of the cable to a 3S battery to power the radio. Turn the radio on and quickly press Connect on the Harxon configuration tool. Note: you must press connect within 3 seconds of powering on the radio, otherwise the radio will default into working mode, rather than programming mode. You must also ensure that the communication port (COM4, COM5, etc) selected actually corresponds to the port your radio is connected to on your machine (this can be verified using the Device Manager in Windows, for instance). The HX-DU8608 has an input voltage range of 9-16 V - using a fully charged 4S battery (~16.5 V) will result in the system not functioning properly.
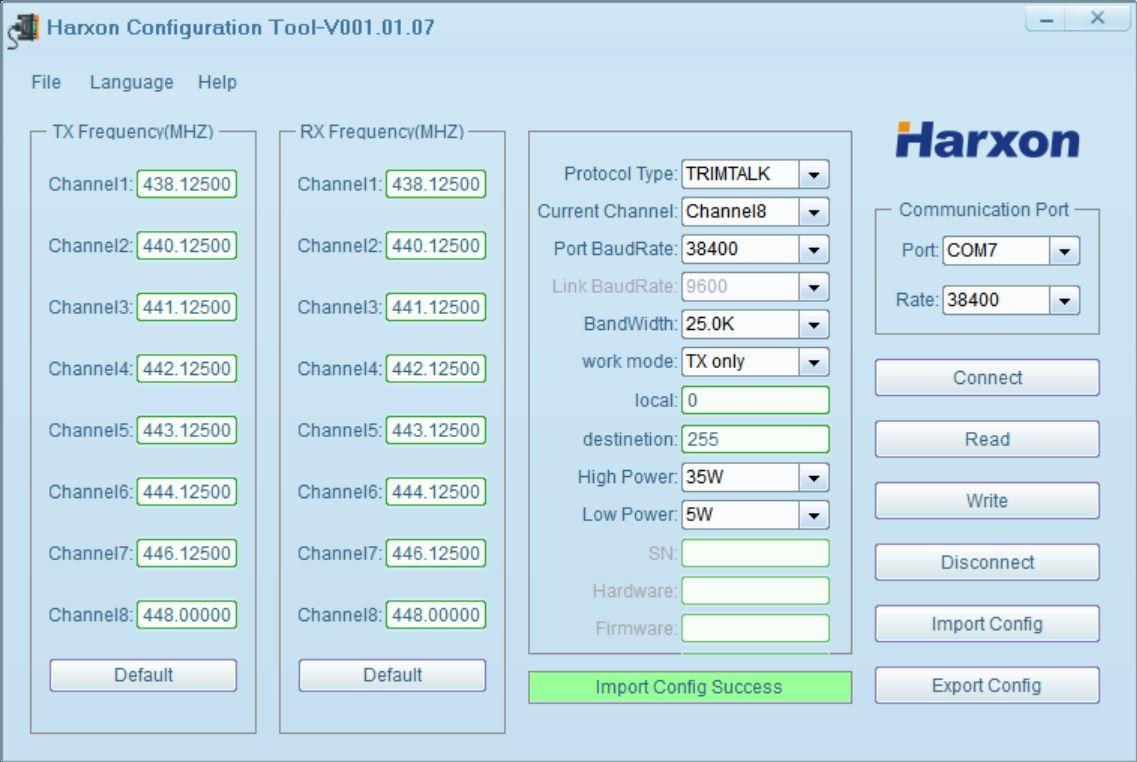
Once the reciever is connected to the configuration tool, ensure that the protocol is set to TrimTalk, port baud rate is set to 38400, bandwidth is set to 25.0K, work mode is set to TX only, and local and destination are set to 0 and 255 respectively. RX/TX channels should correspond to the frequency values set for channels 1-8 in Cube-A (e.g. Channel 7: 446.125 MHz, Channel 8: 448.000 MHz), to ensure that the channel selected by the radio and the GNSS rover both correspond to the same frequency. Once you have confirmed the settings entered are correct, write the settings to the radio using the Write button.
