Project Reference Setup
Choose Coordinate Reference System
The Project CRS is one of the most important configurations within LiDARMill, as this coordinate reference system will be used for all processed data outputs, as well as any uploaded files, including ground control point files.
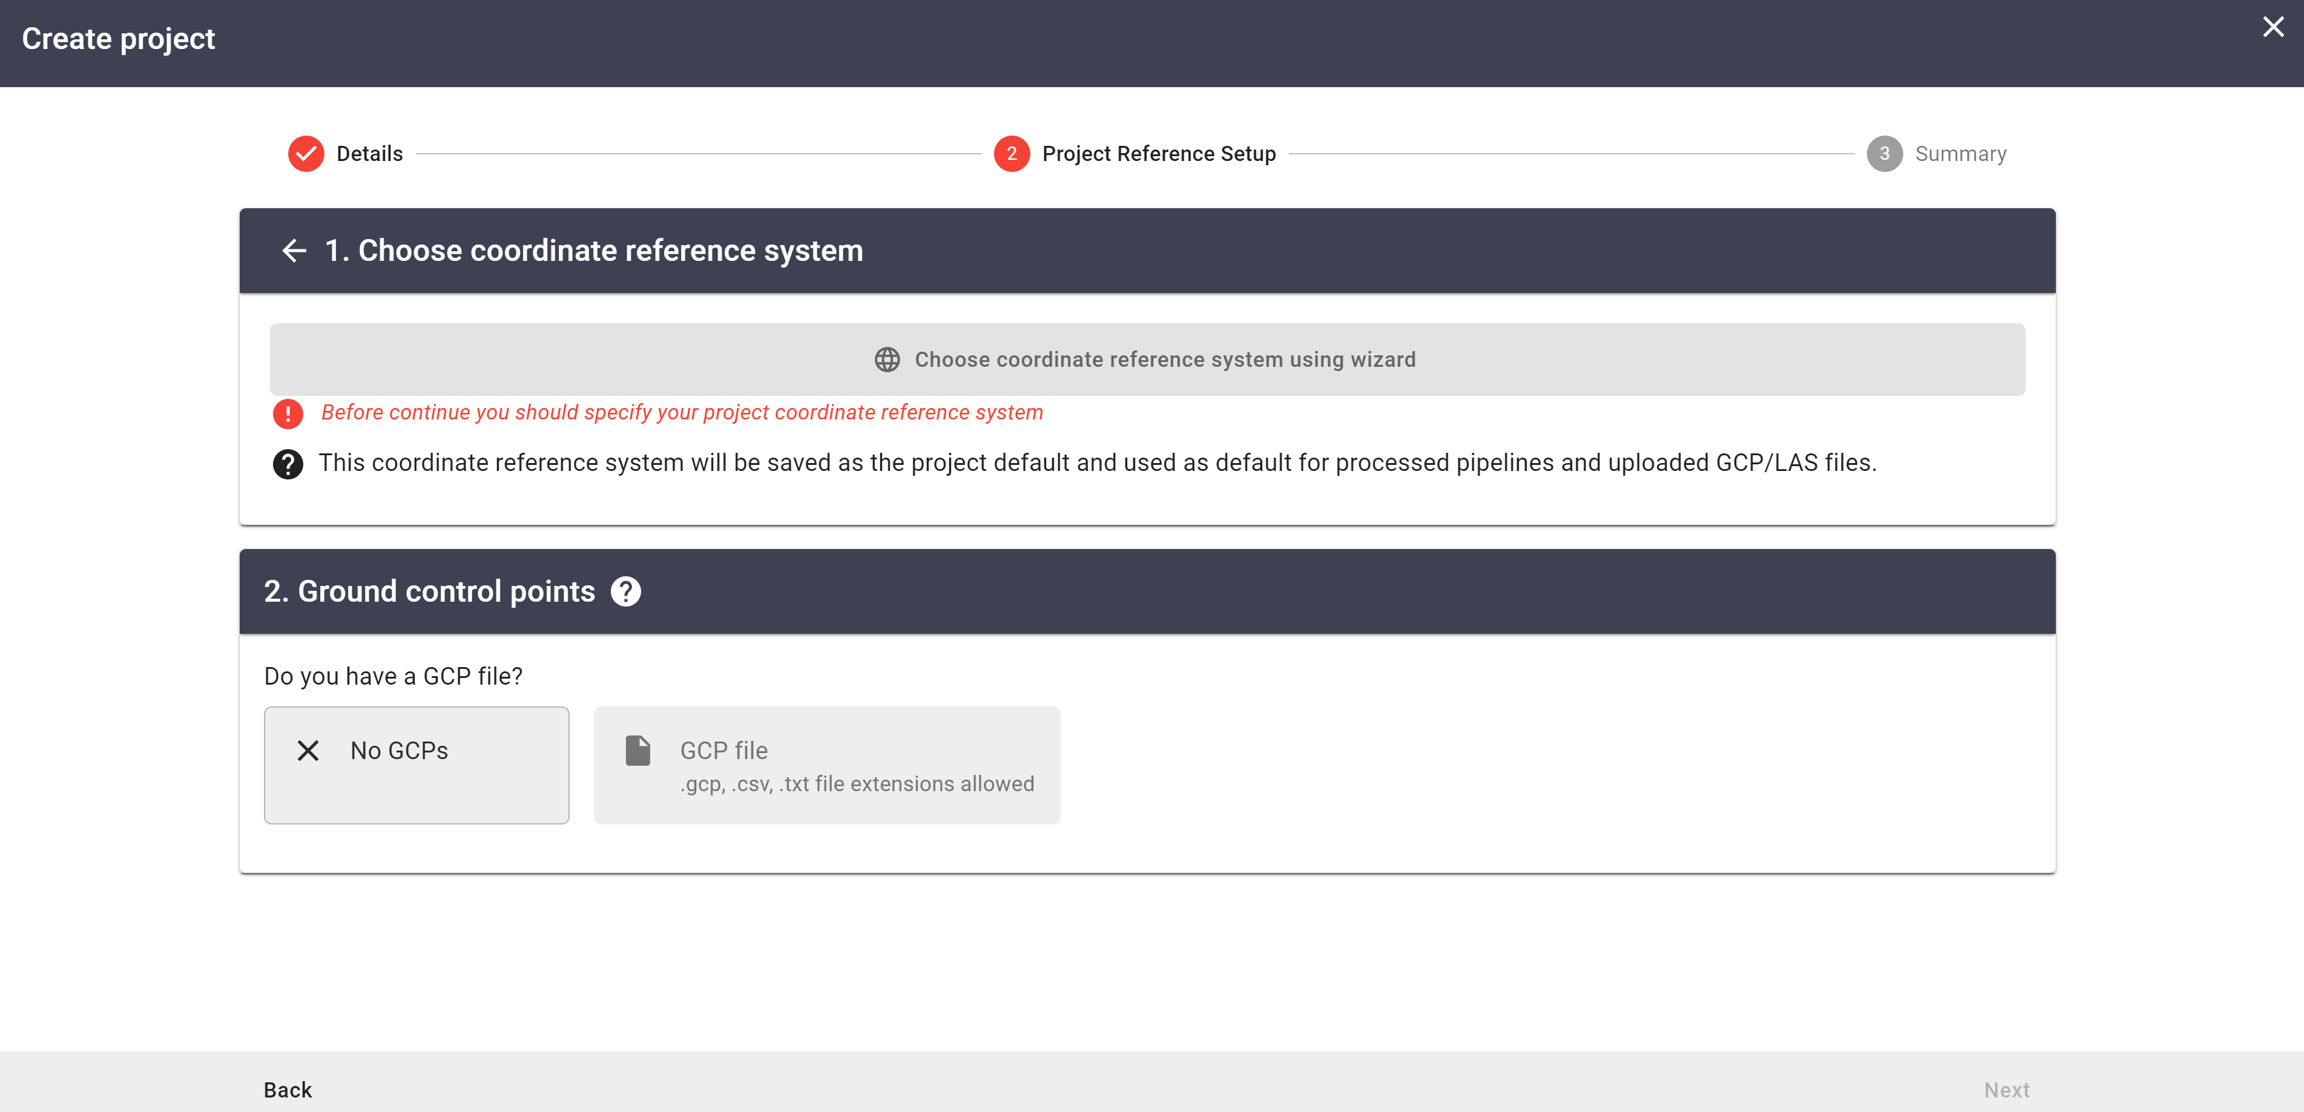
Click on "Choose Coordinate Reference System Using Wizard" button
Coordinate Reference System Selecting Wizard
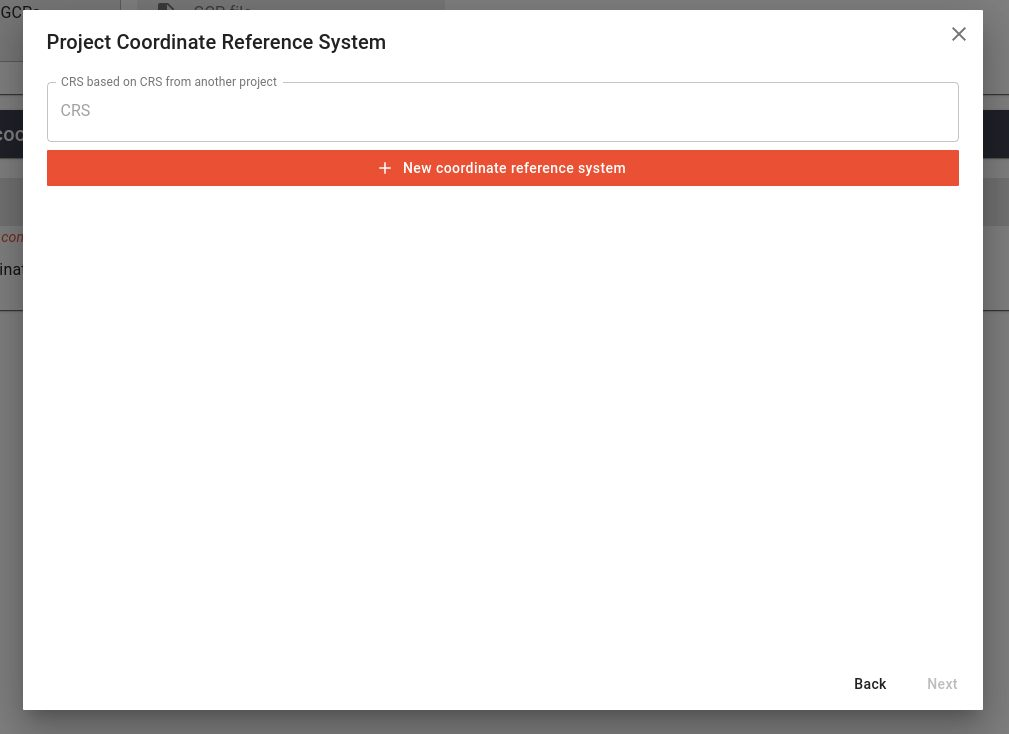
Select previously used CRS
Select a coordinate reference system that was previously used in another project by clicking in the space within the CRS box.
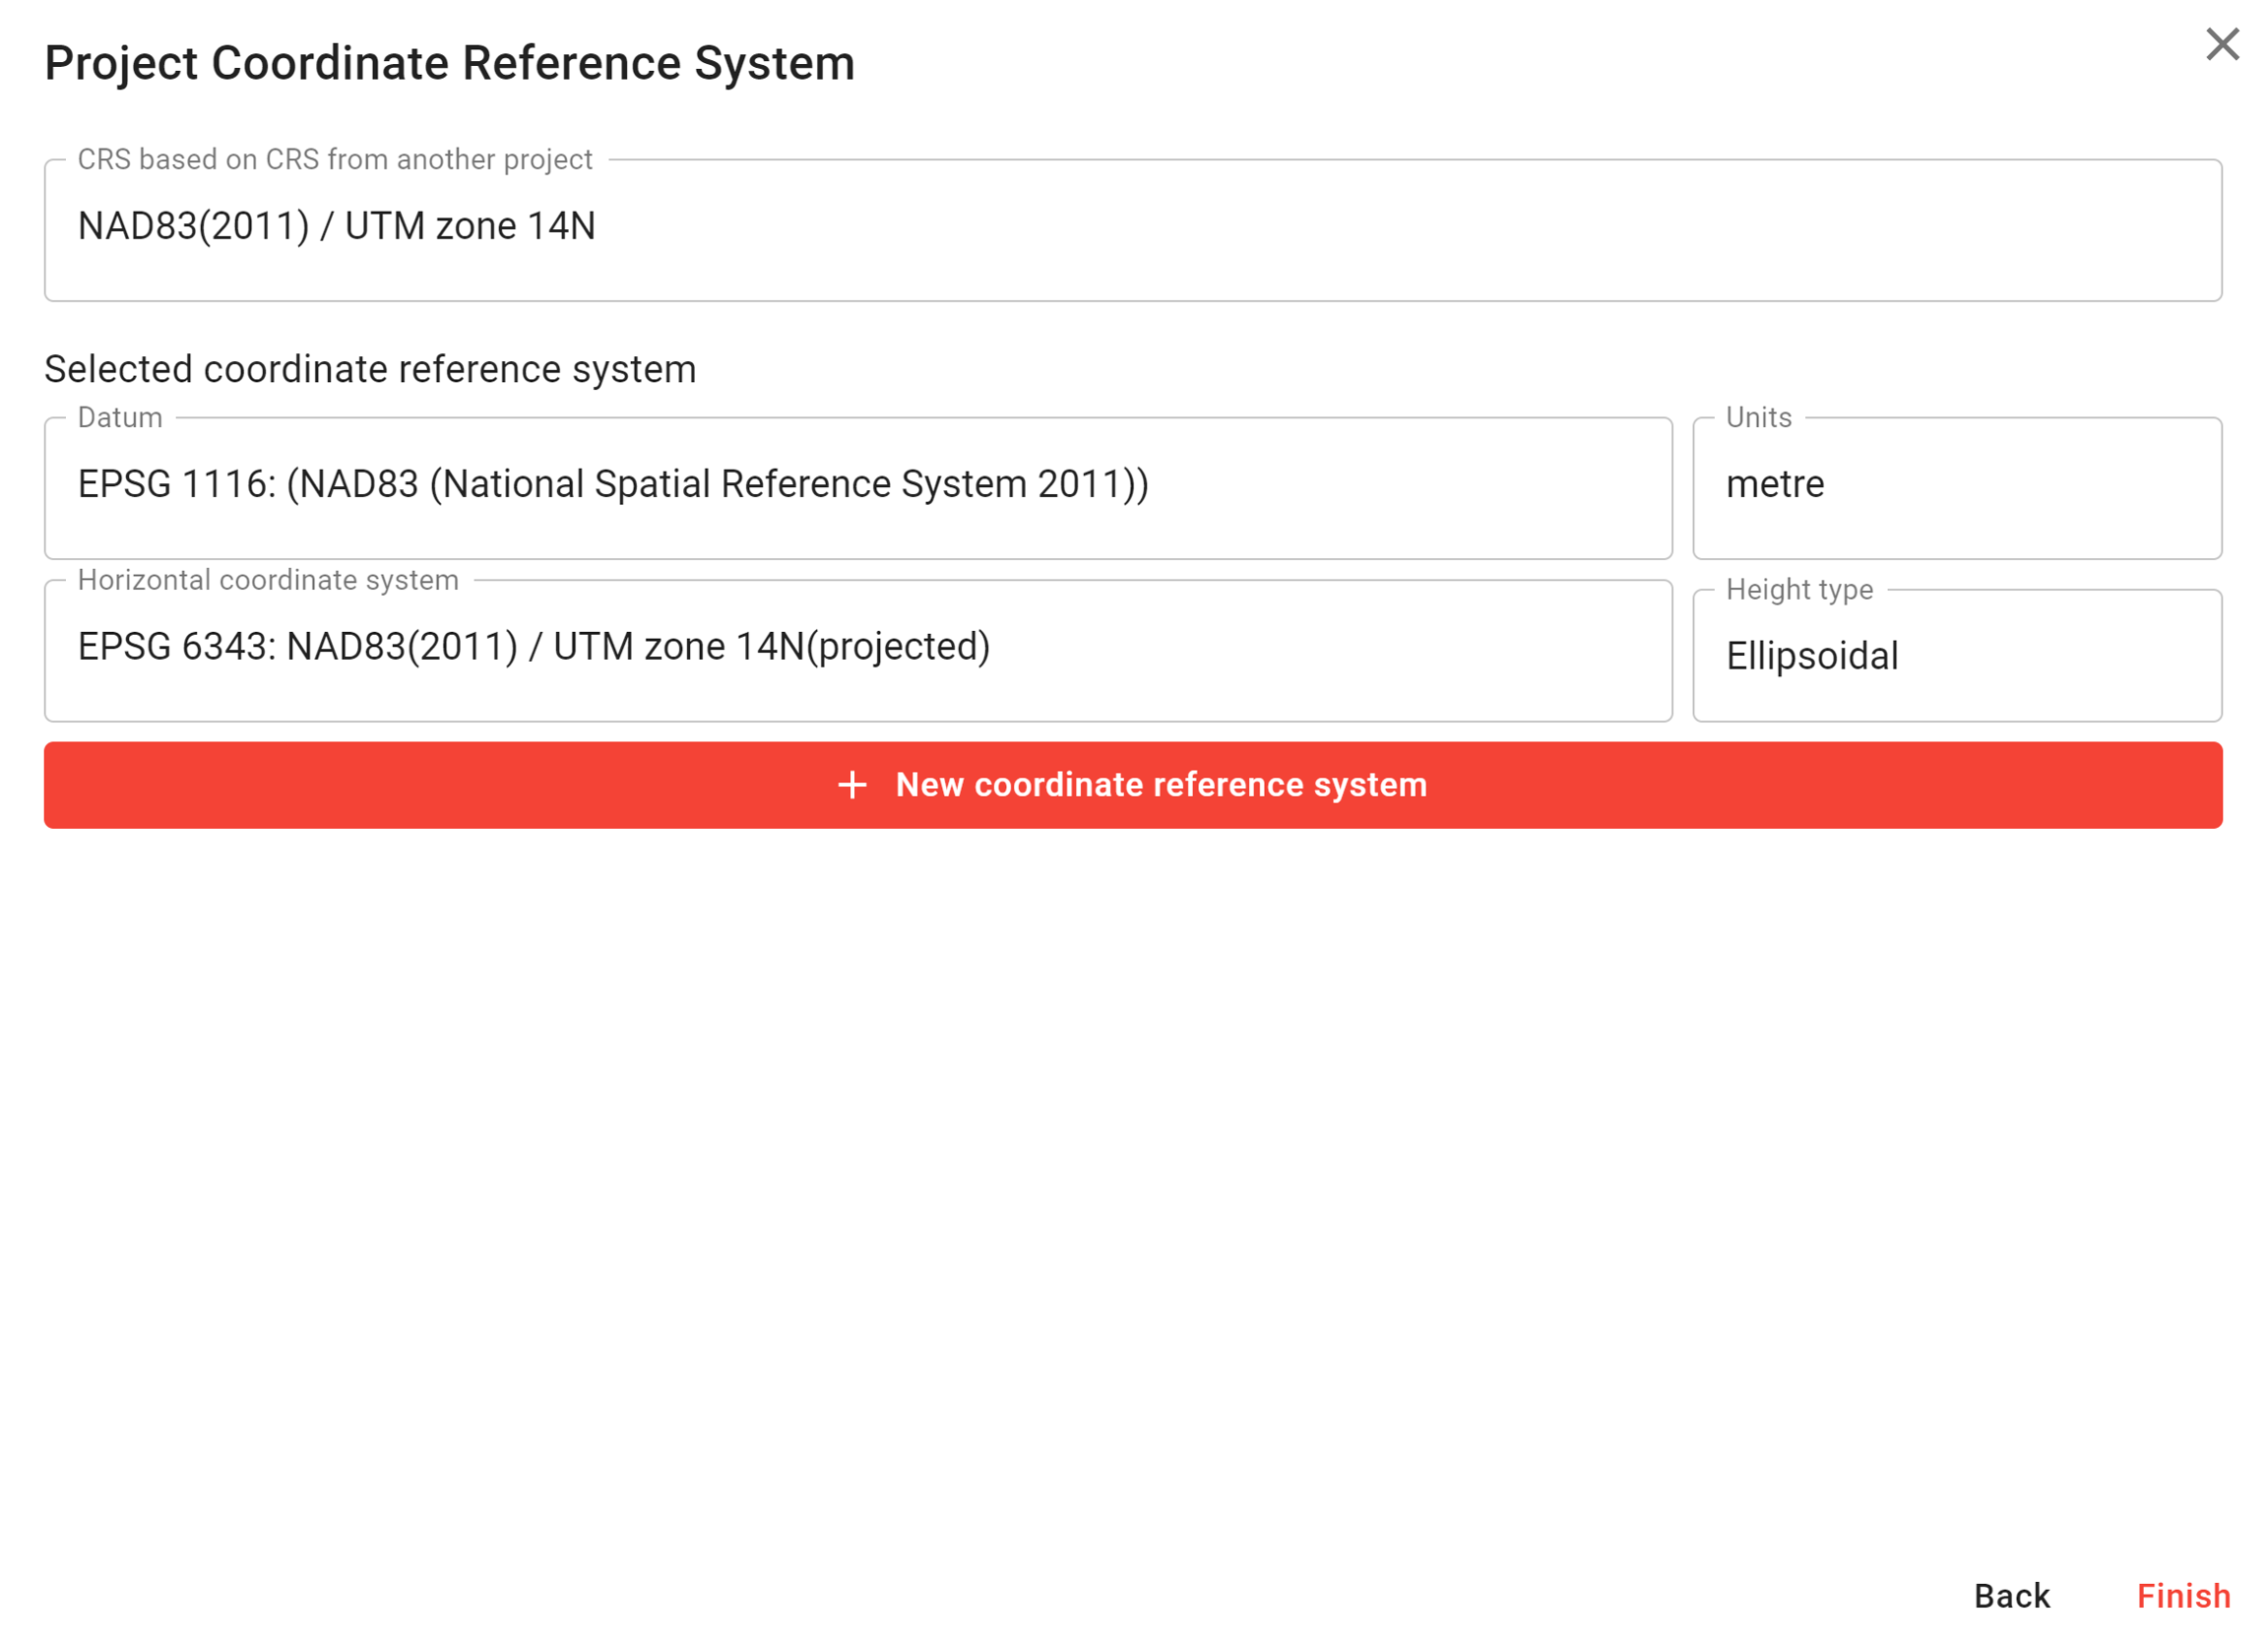
Click "Finish" after selecting a CRS based on CRS from another project, or alternatively, add a new coordinate reference system to be used for the project.
+ New Coordinate Reference System
If you wish to create a new project CRS, click on the red "New coordinate Reference system" button to move onto the CRS selection wizard.
Generic CRS
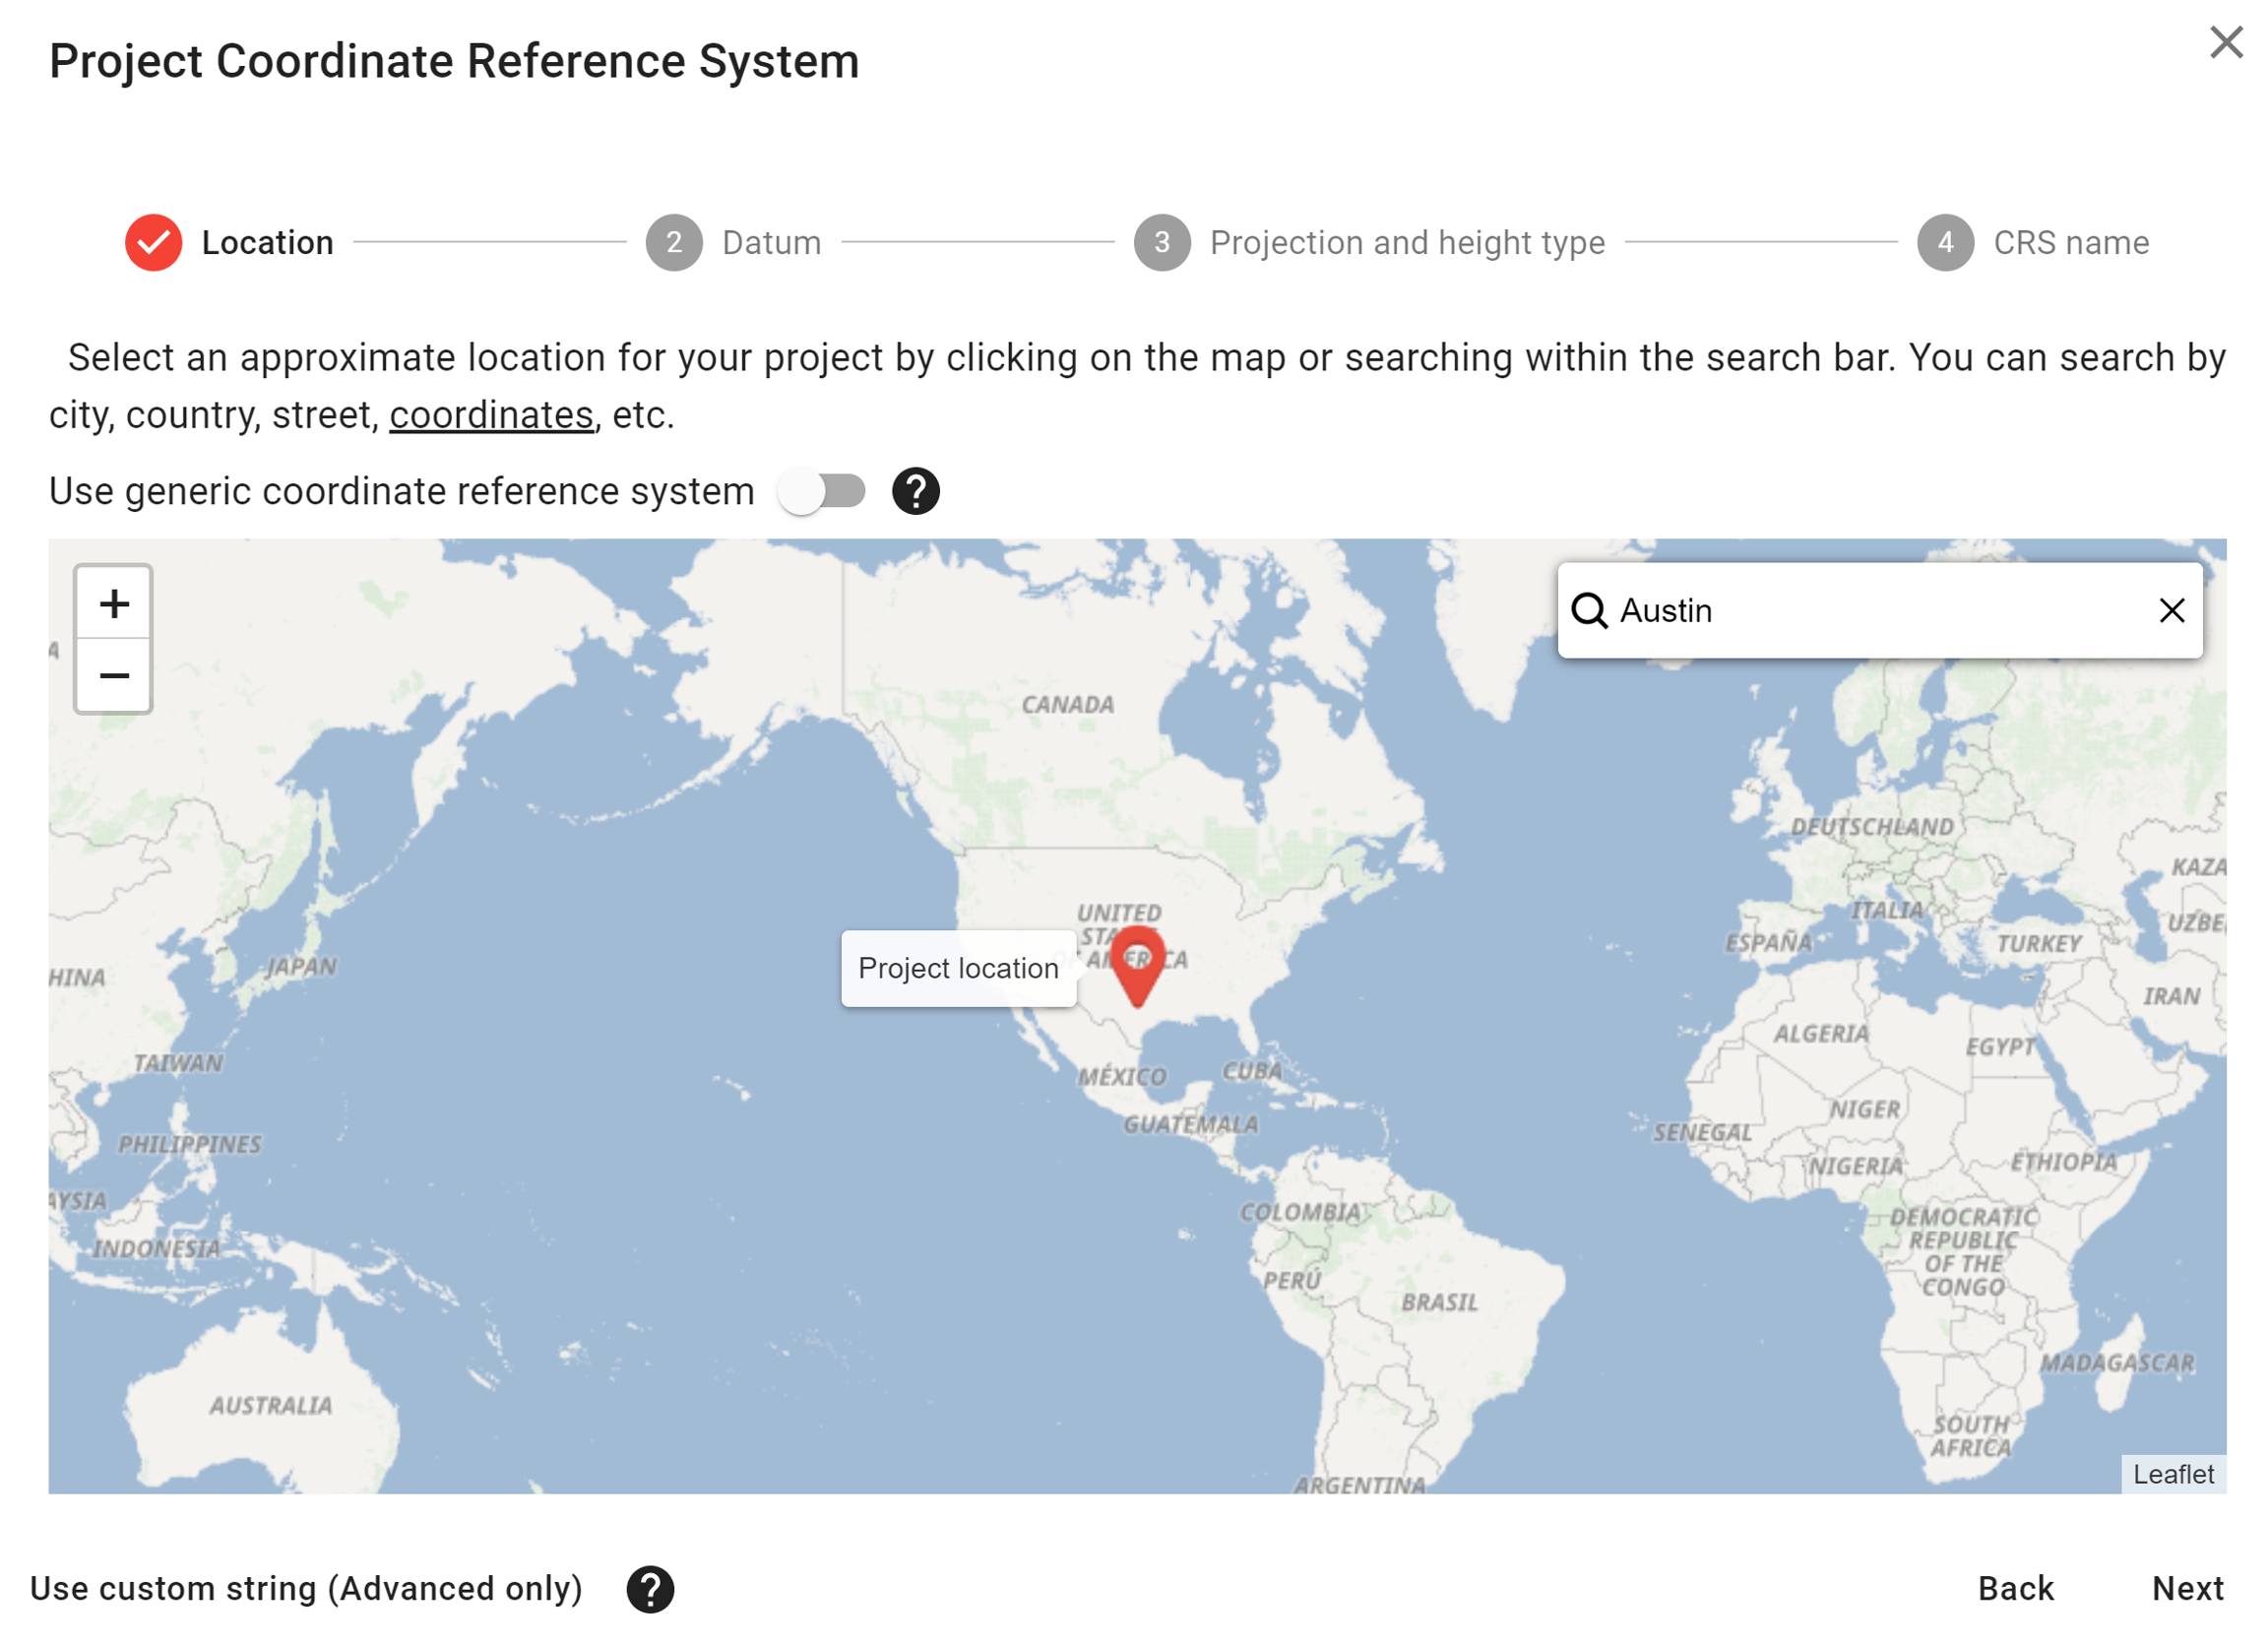
If you do not have a preferred CRS, you can flip the switch to enable the "use generic coordinate reference system" option. This option requires you to select an approximate project location on the map with a click of the mouse, or by searching for the location within the project location search bar. The selected project location determines which WGS84 UTM zone will be set for the project.
Coordinate Reference System
If you have a preferred CRS, leave the "use generic coordinate reference system" switch disabled. Select an approximate location for your project by clicking on the map or searching within the search bar. You can search by city, country, street, coordinates, etc. Click "Next" when finished.
Advanced usage
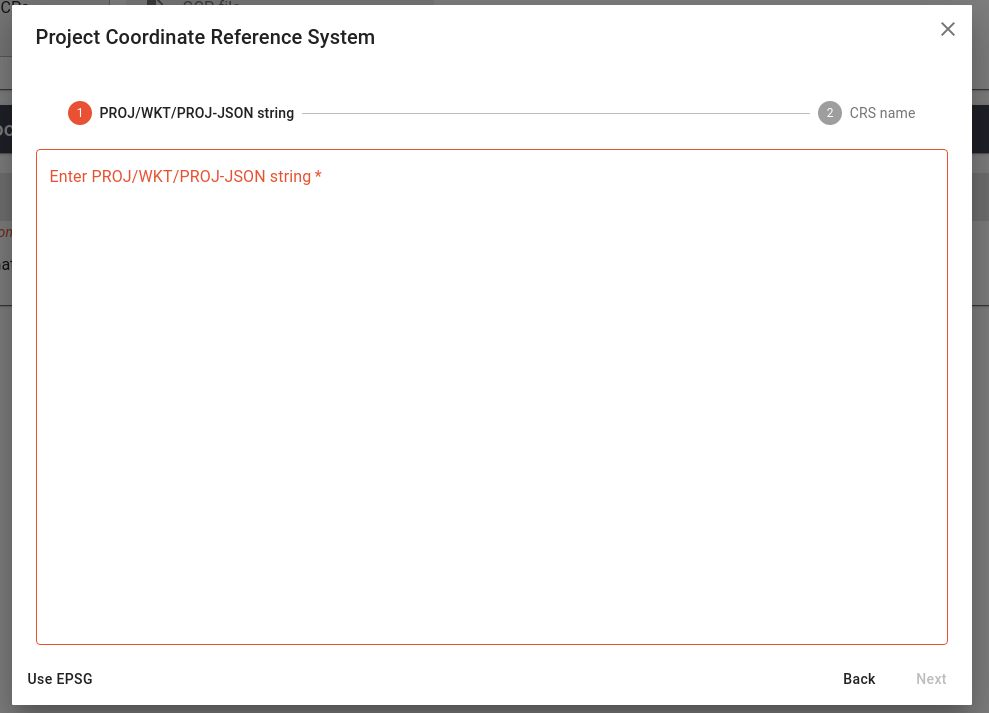
When the user selects "Use custom string (Advanced only)" at the bottom left of the Project Coordinate Reference System window, the user has the option to input a PROJ, WKT, or PROJ-JSON string for custom project CRS input. There is also the option at the bottom left of this window to click on "Use EPSG". This option brings you back to the original Project Coordinate Reference System window with map view.
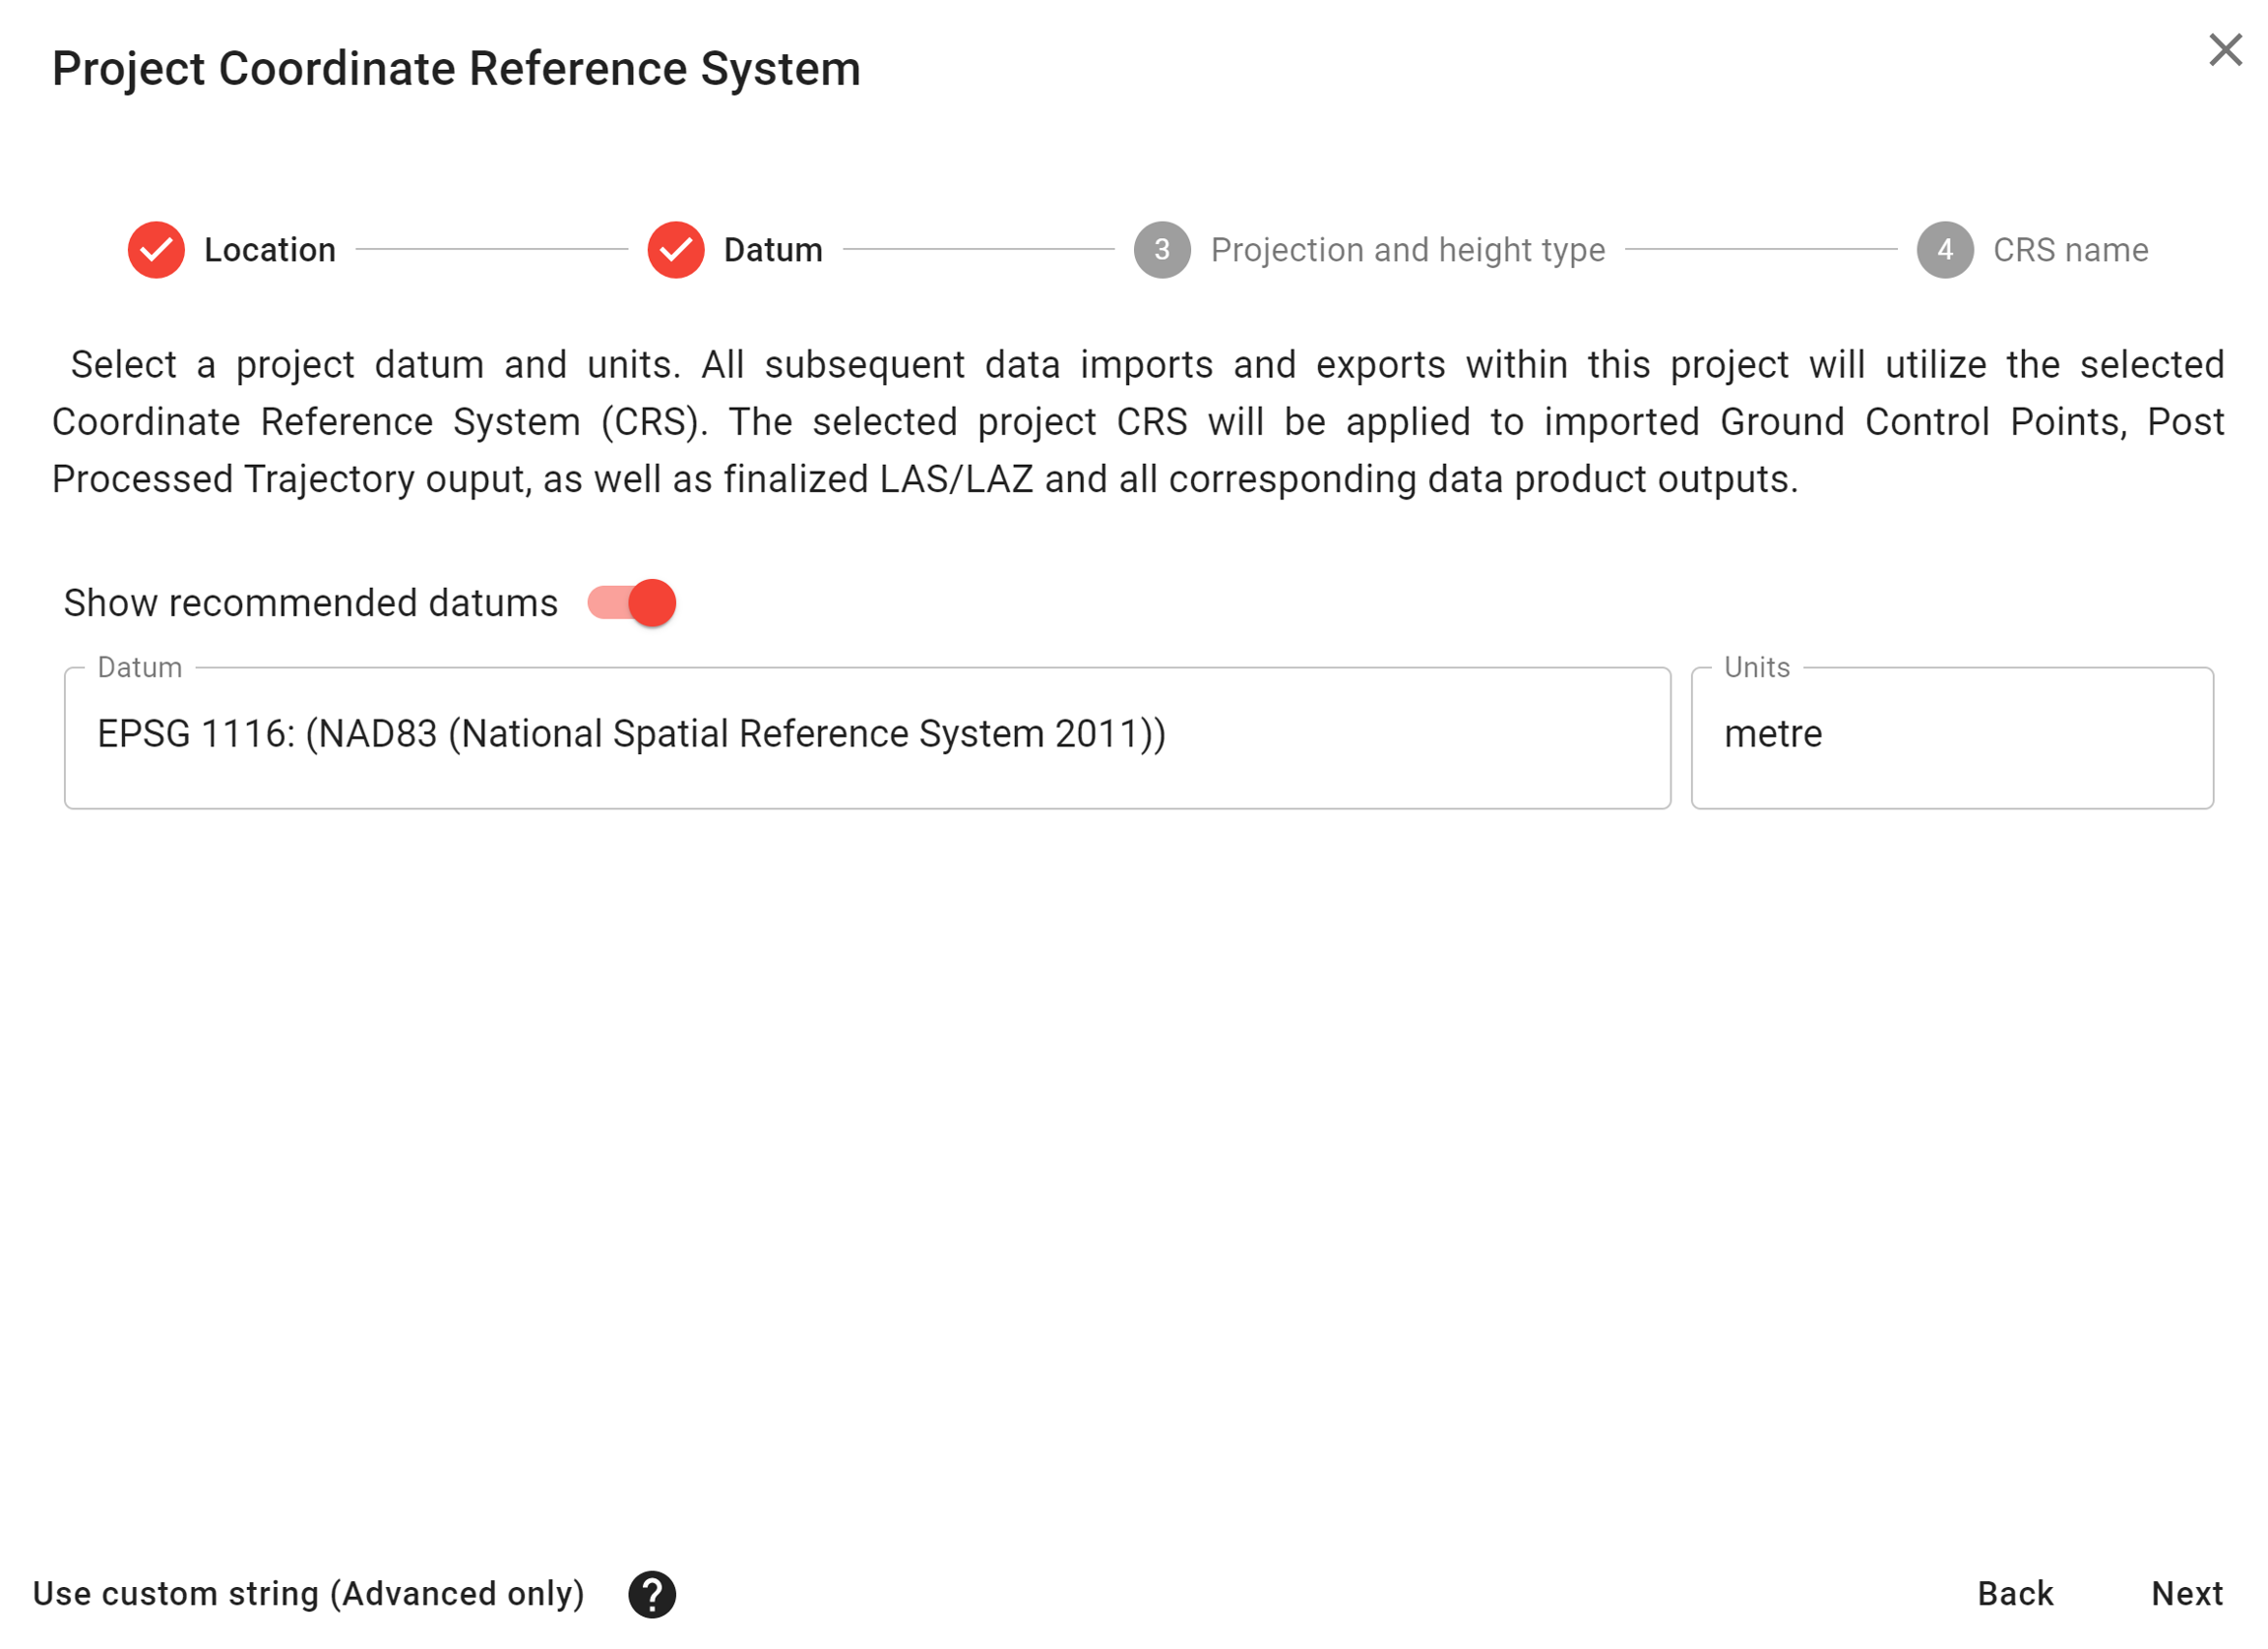
Select a project datum and units. The "Show recommended datums" is enabled, by default. All subsequent data imports and exports within this project will utilize the selected Coordinate Reference System (CRS). The selected project CRS will be applied to imported Ground Control Points, Post Processed Trajectory output, as well as finalized LAS/LAZ and all corresponding data product outputs. Click "Next" when finished.
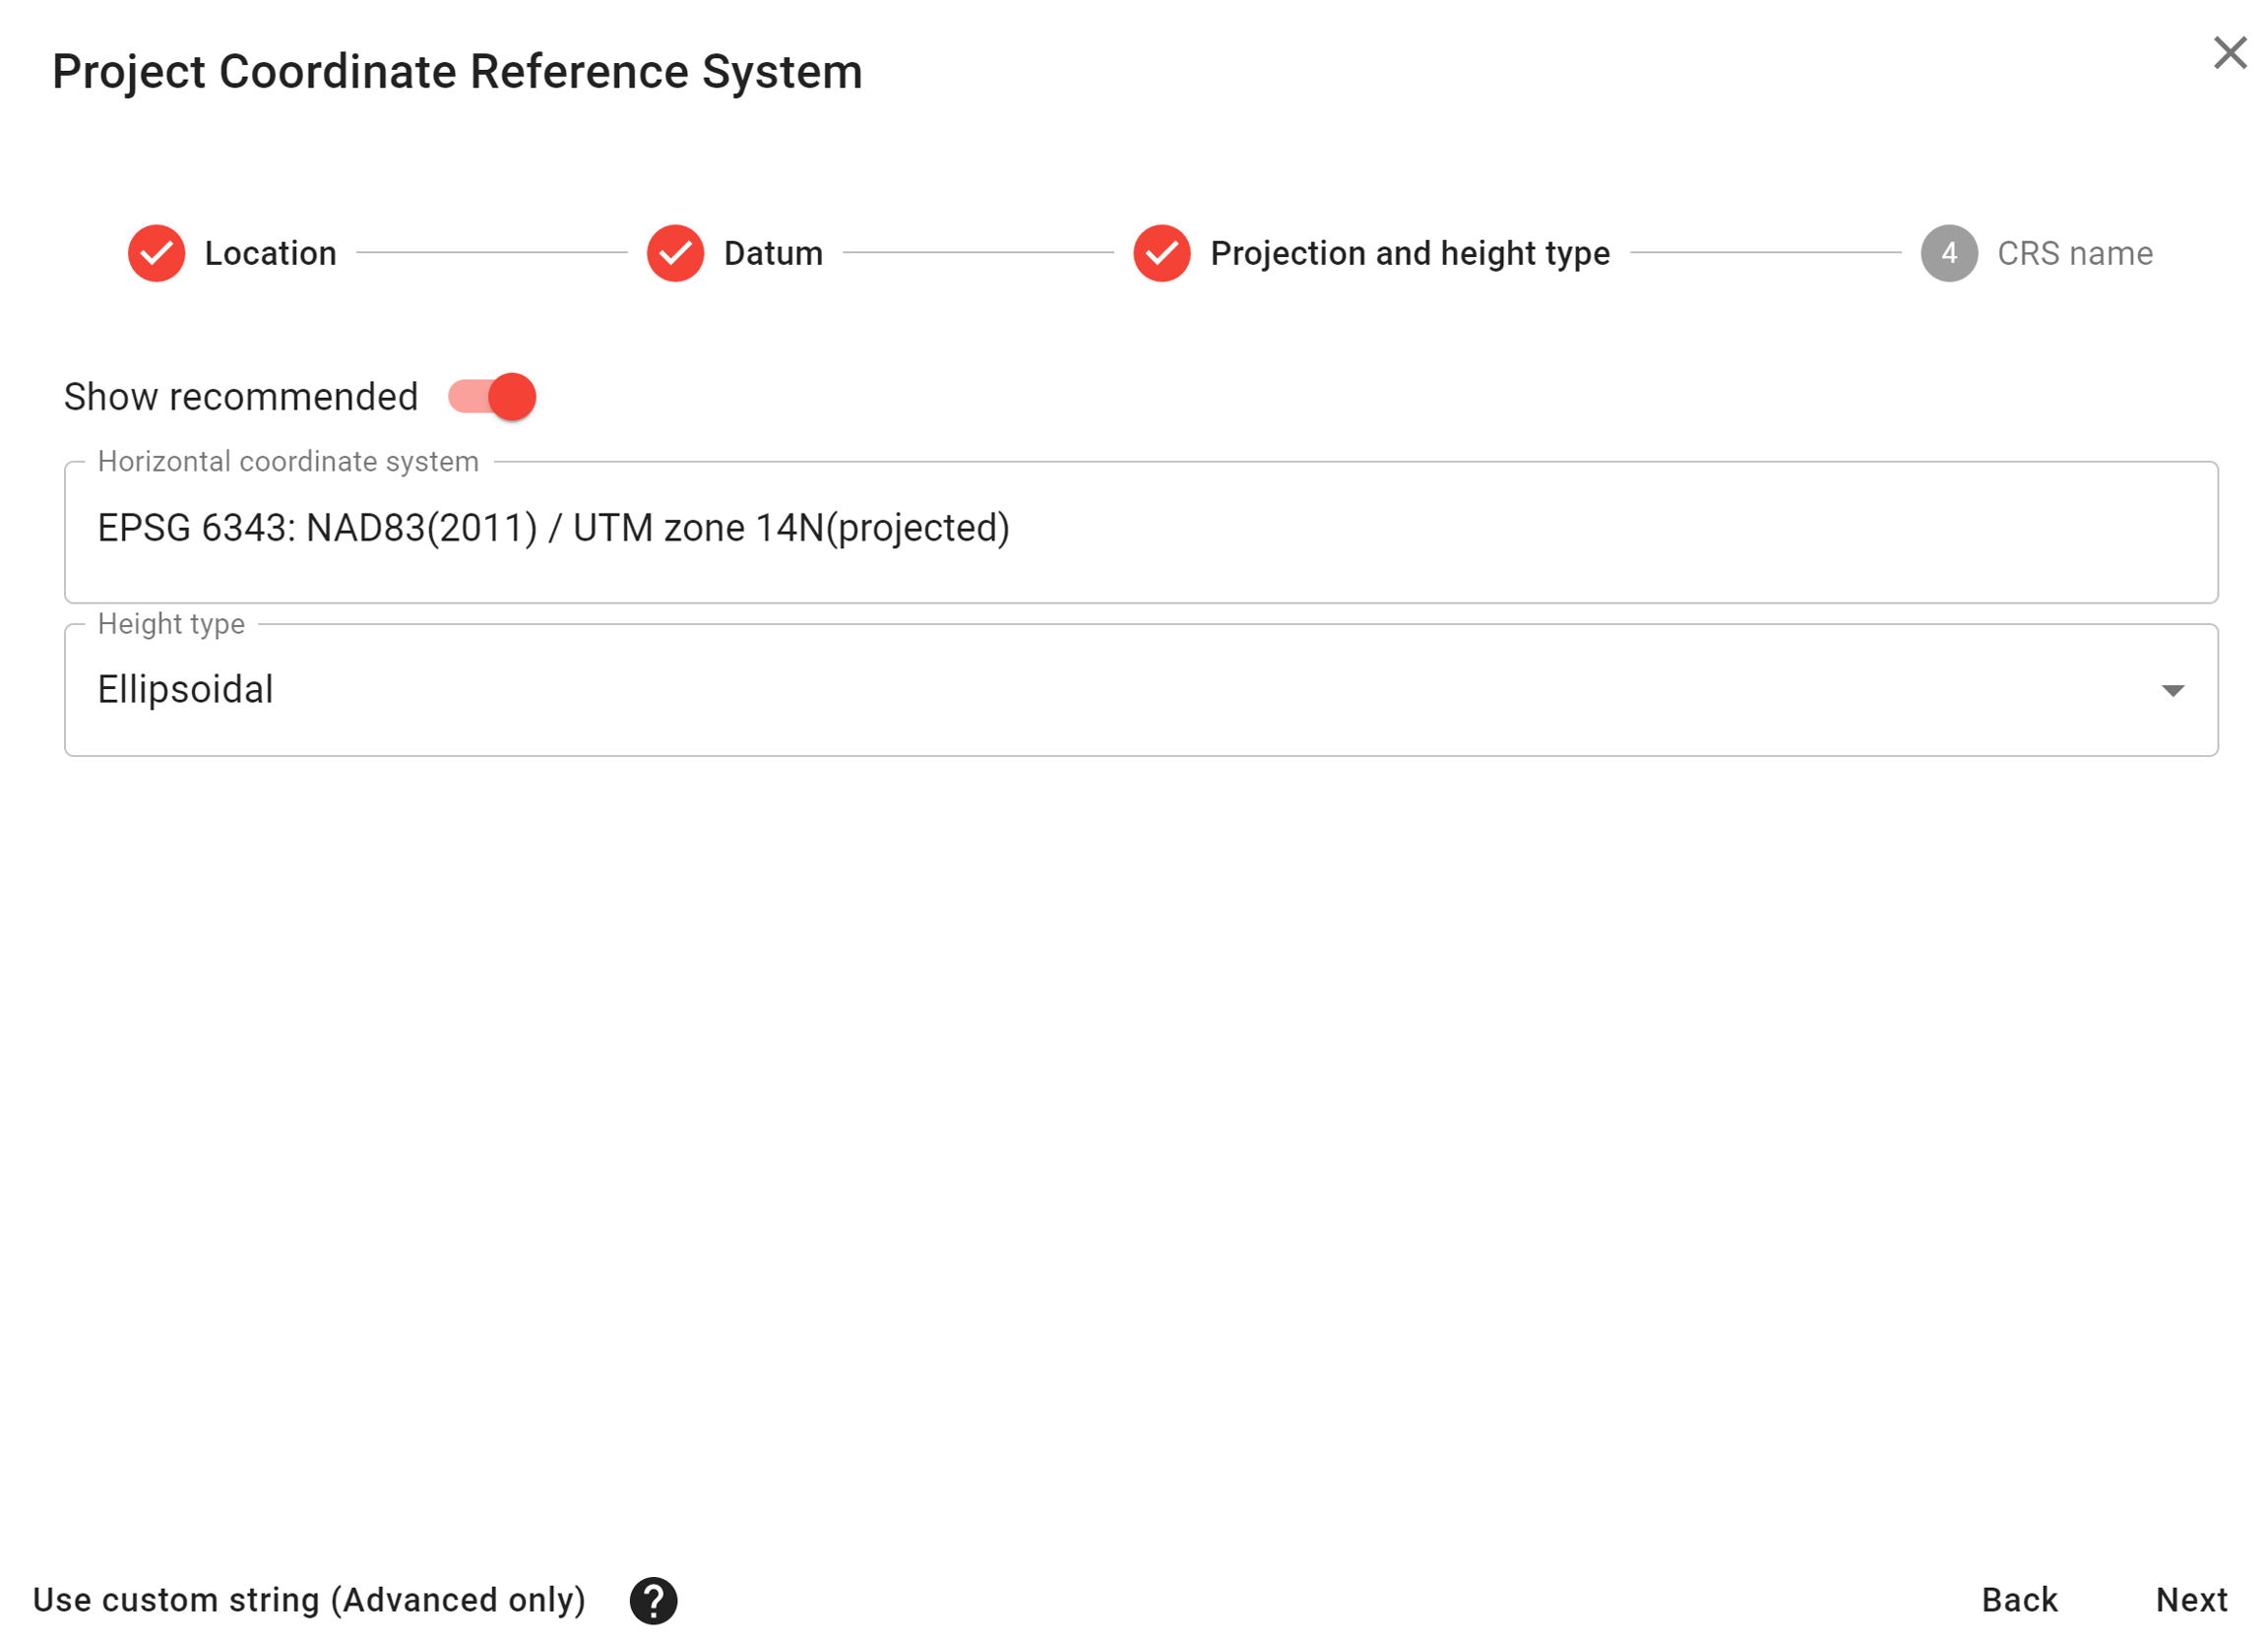
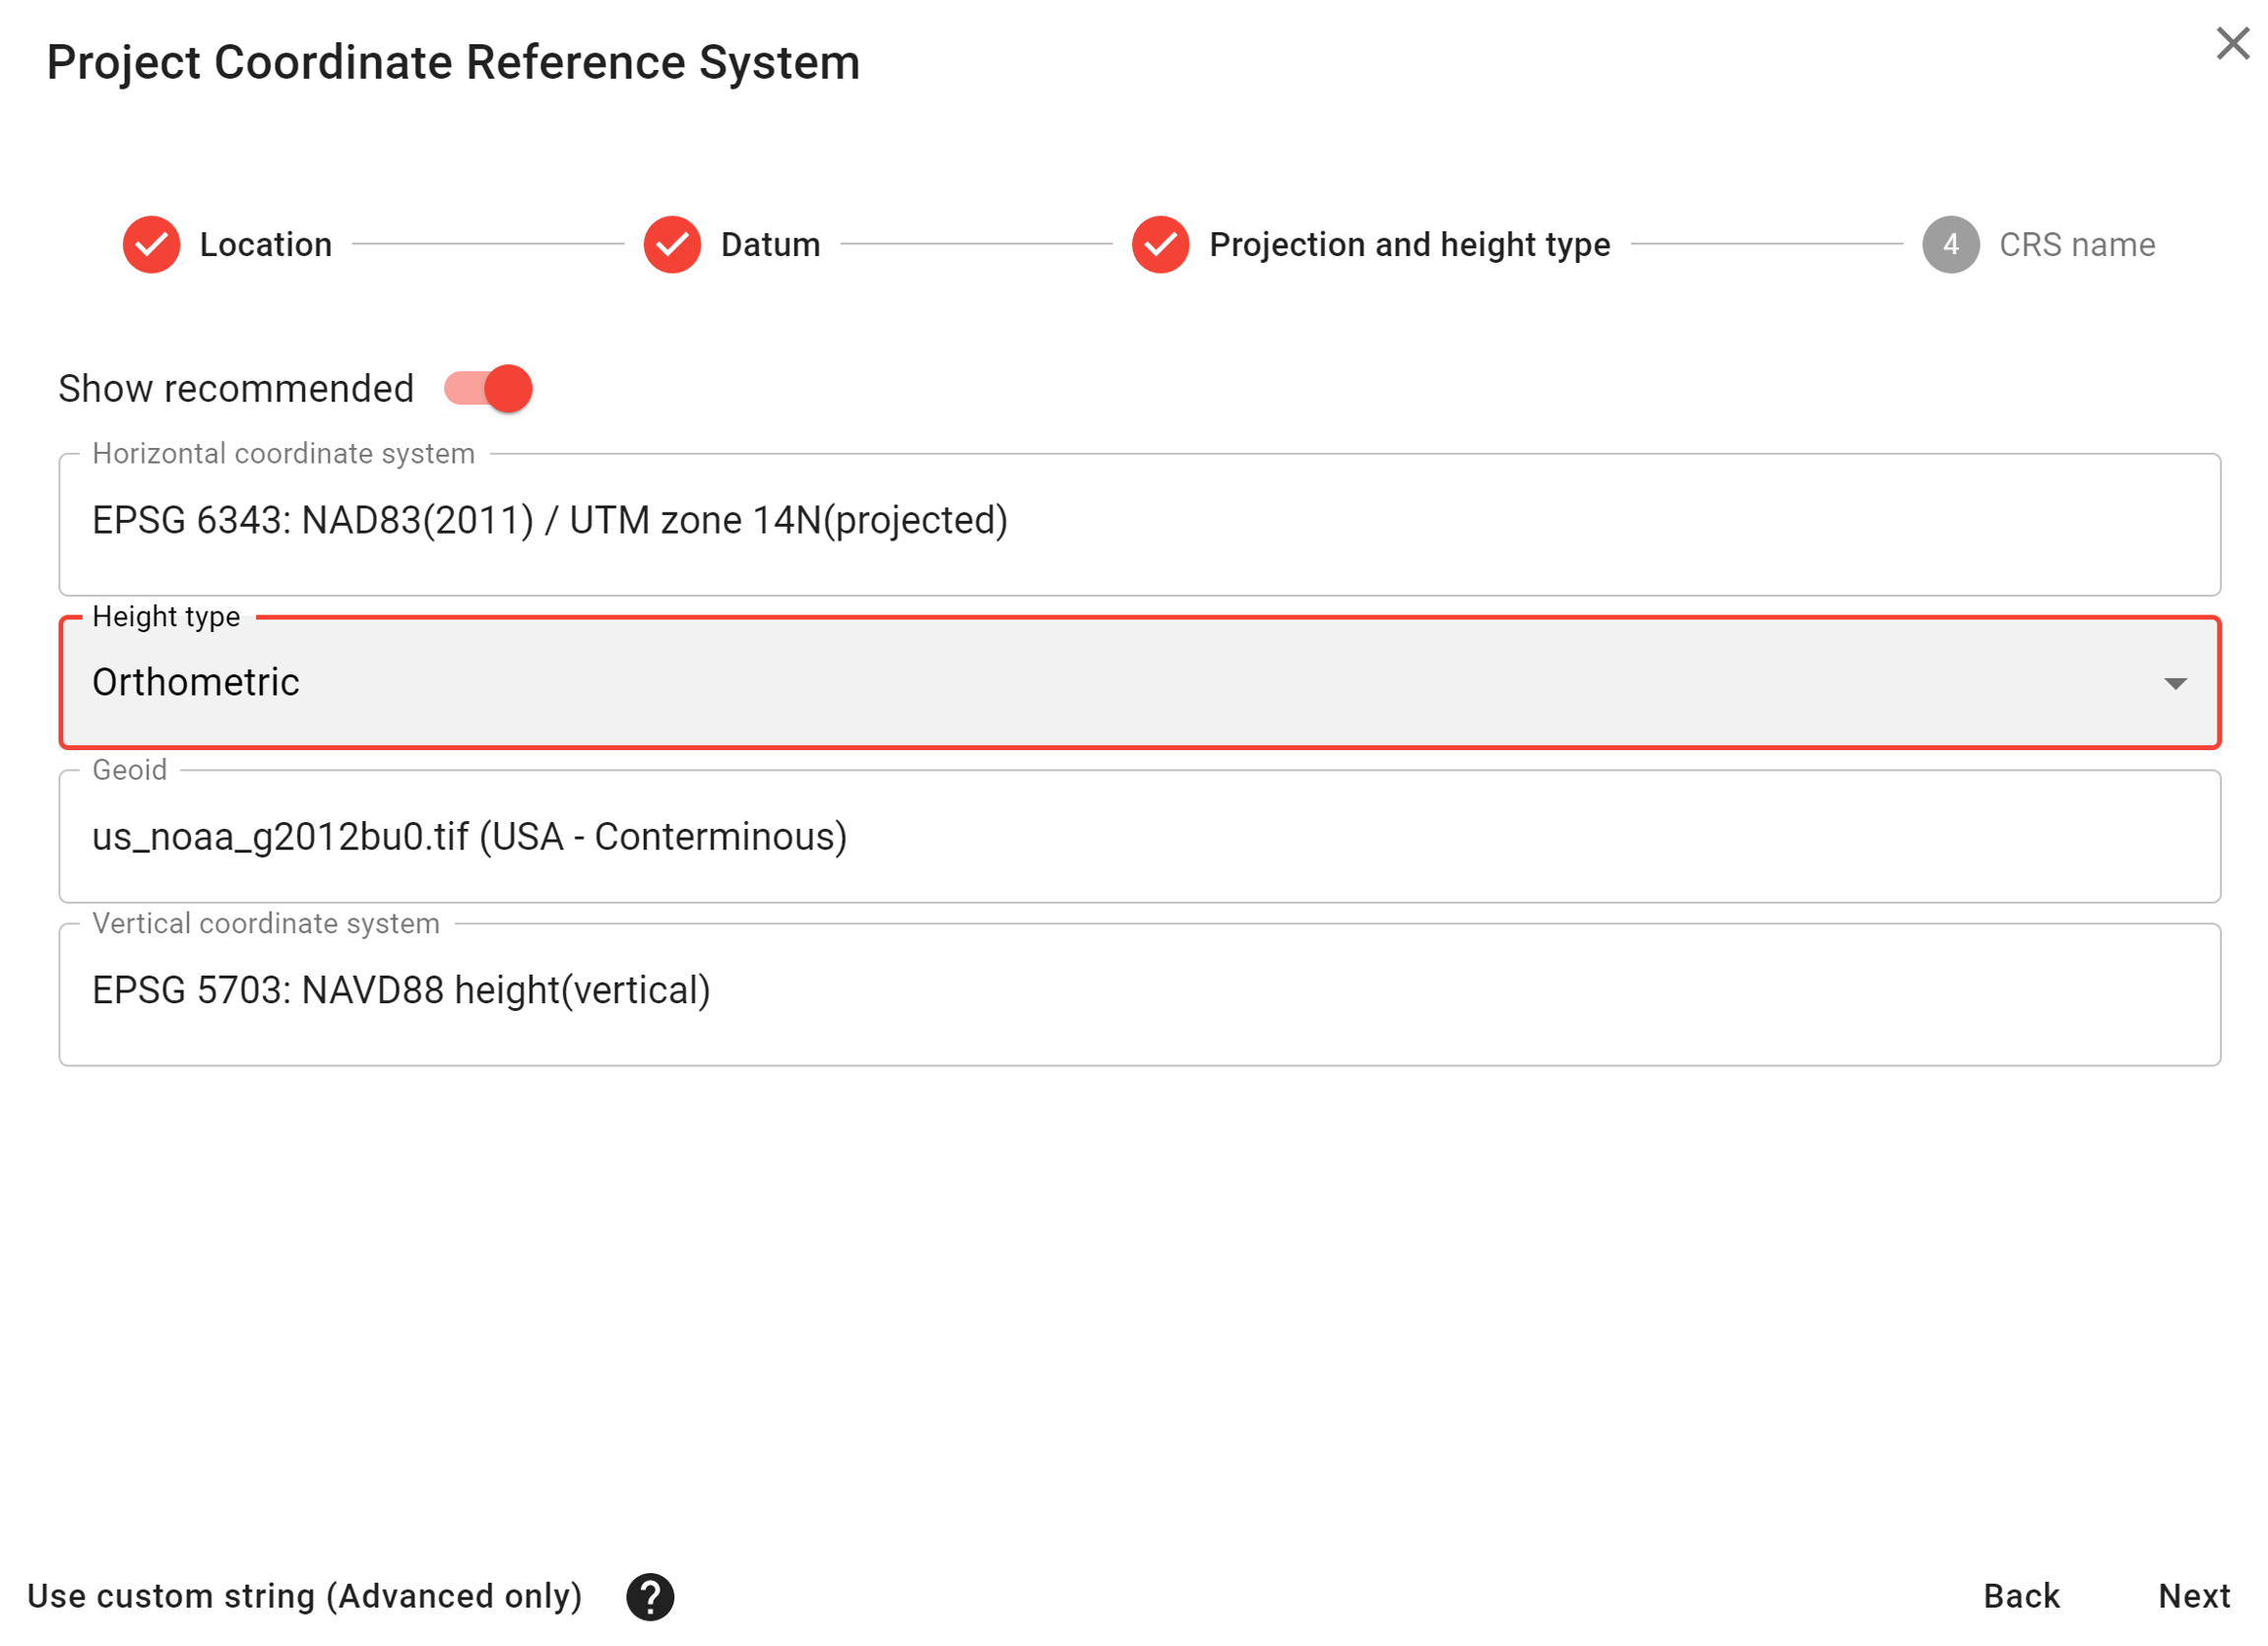
With the datum selected, you should now select the project's horizontal coordinate system and corresponding height type (Ellipsoidal or Orthometric). When you select "Orthometric" as the height type, you will need to select your desired geoid model and corresponding vertical coordinate system. Click "Next" when finished.
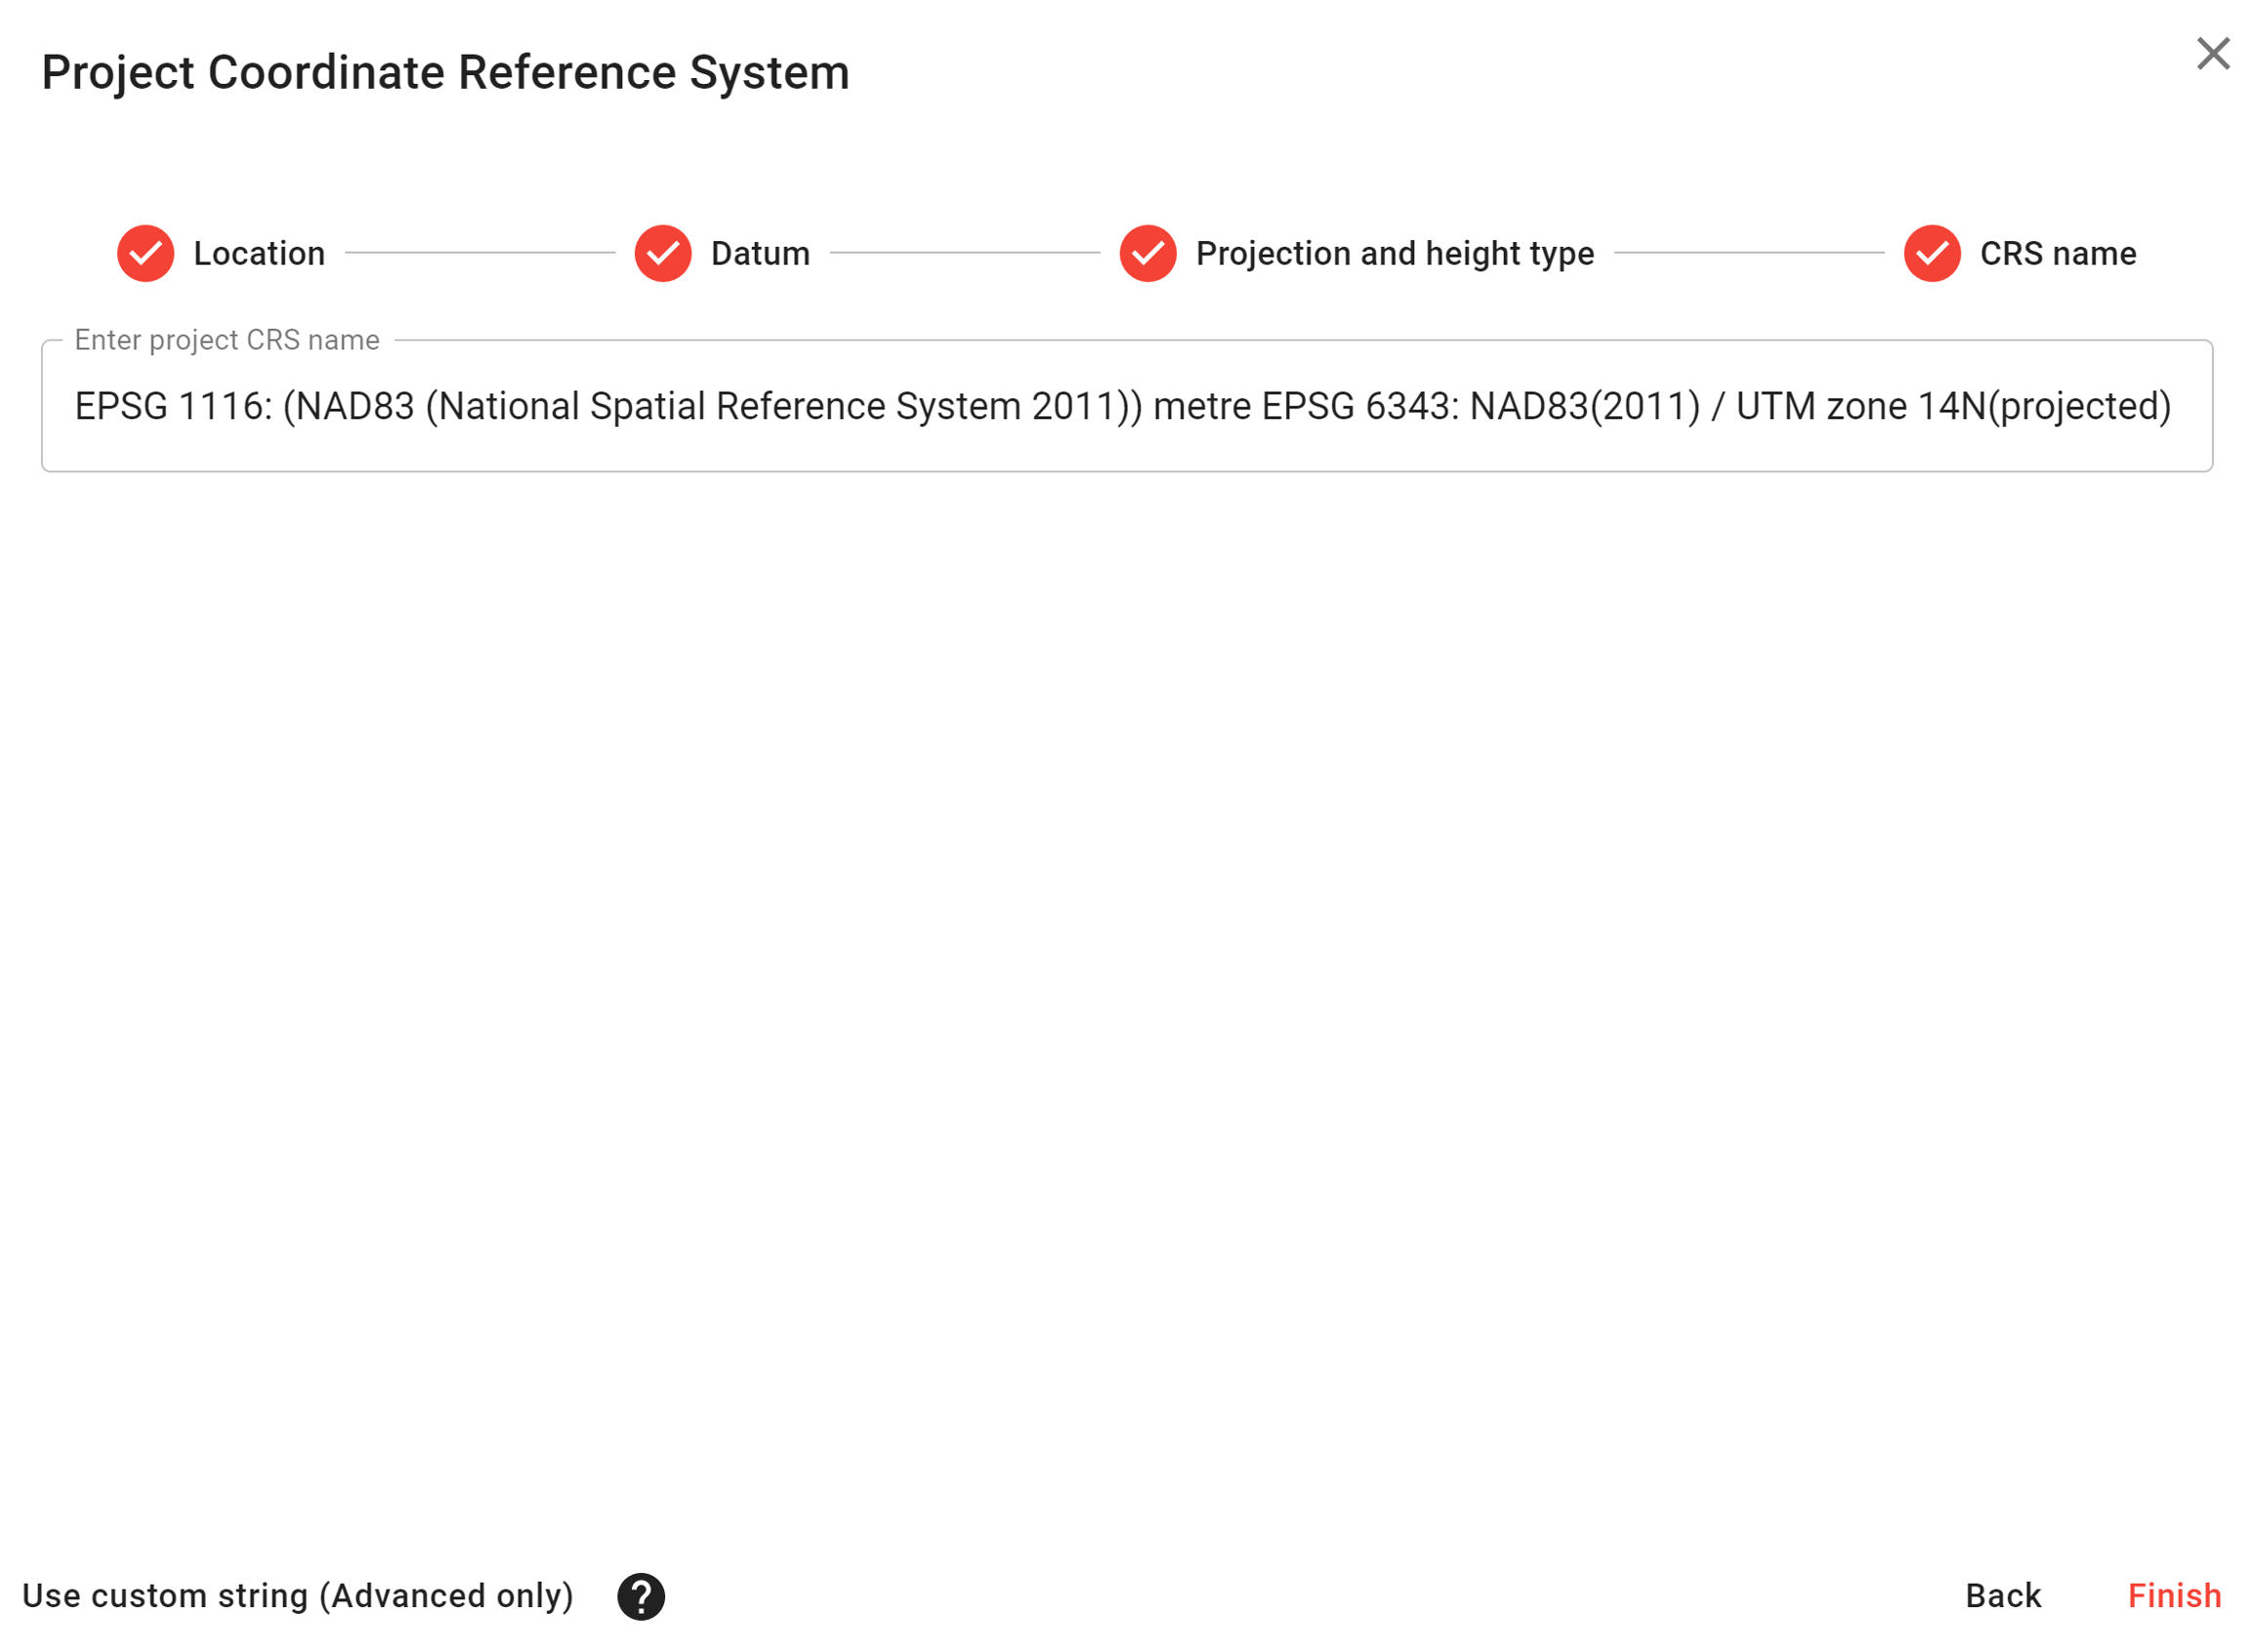
The final step is to confirm or edit the project CRS name. This CRS configuration will be saved to your LiDARMill user profile under this name. This way, if you would like to utilize this CRS in the future, you will be able to select it from your CRS list at the top of the Project Coordinate Reference System window under "CRS based on CRS from another project". Click "finish" to finalize Project CRS.
Ground Control
Under the Project Reference Setup tab, you can choose whether or not to import ground control to be used for data optimization and/or absolute accuracy analysis.
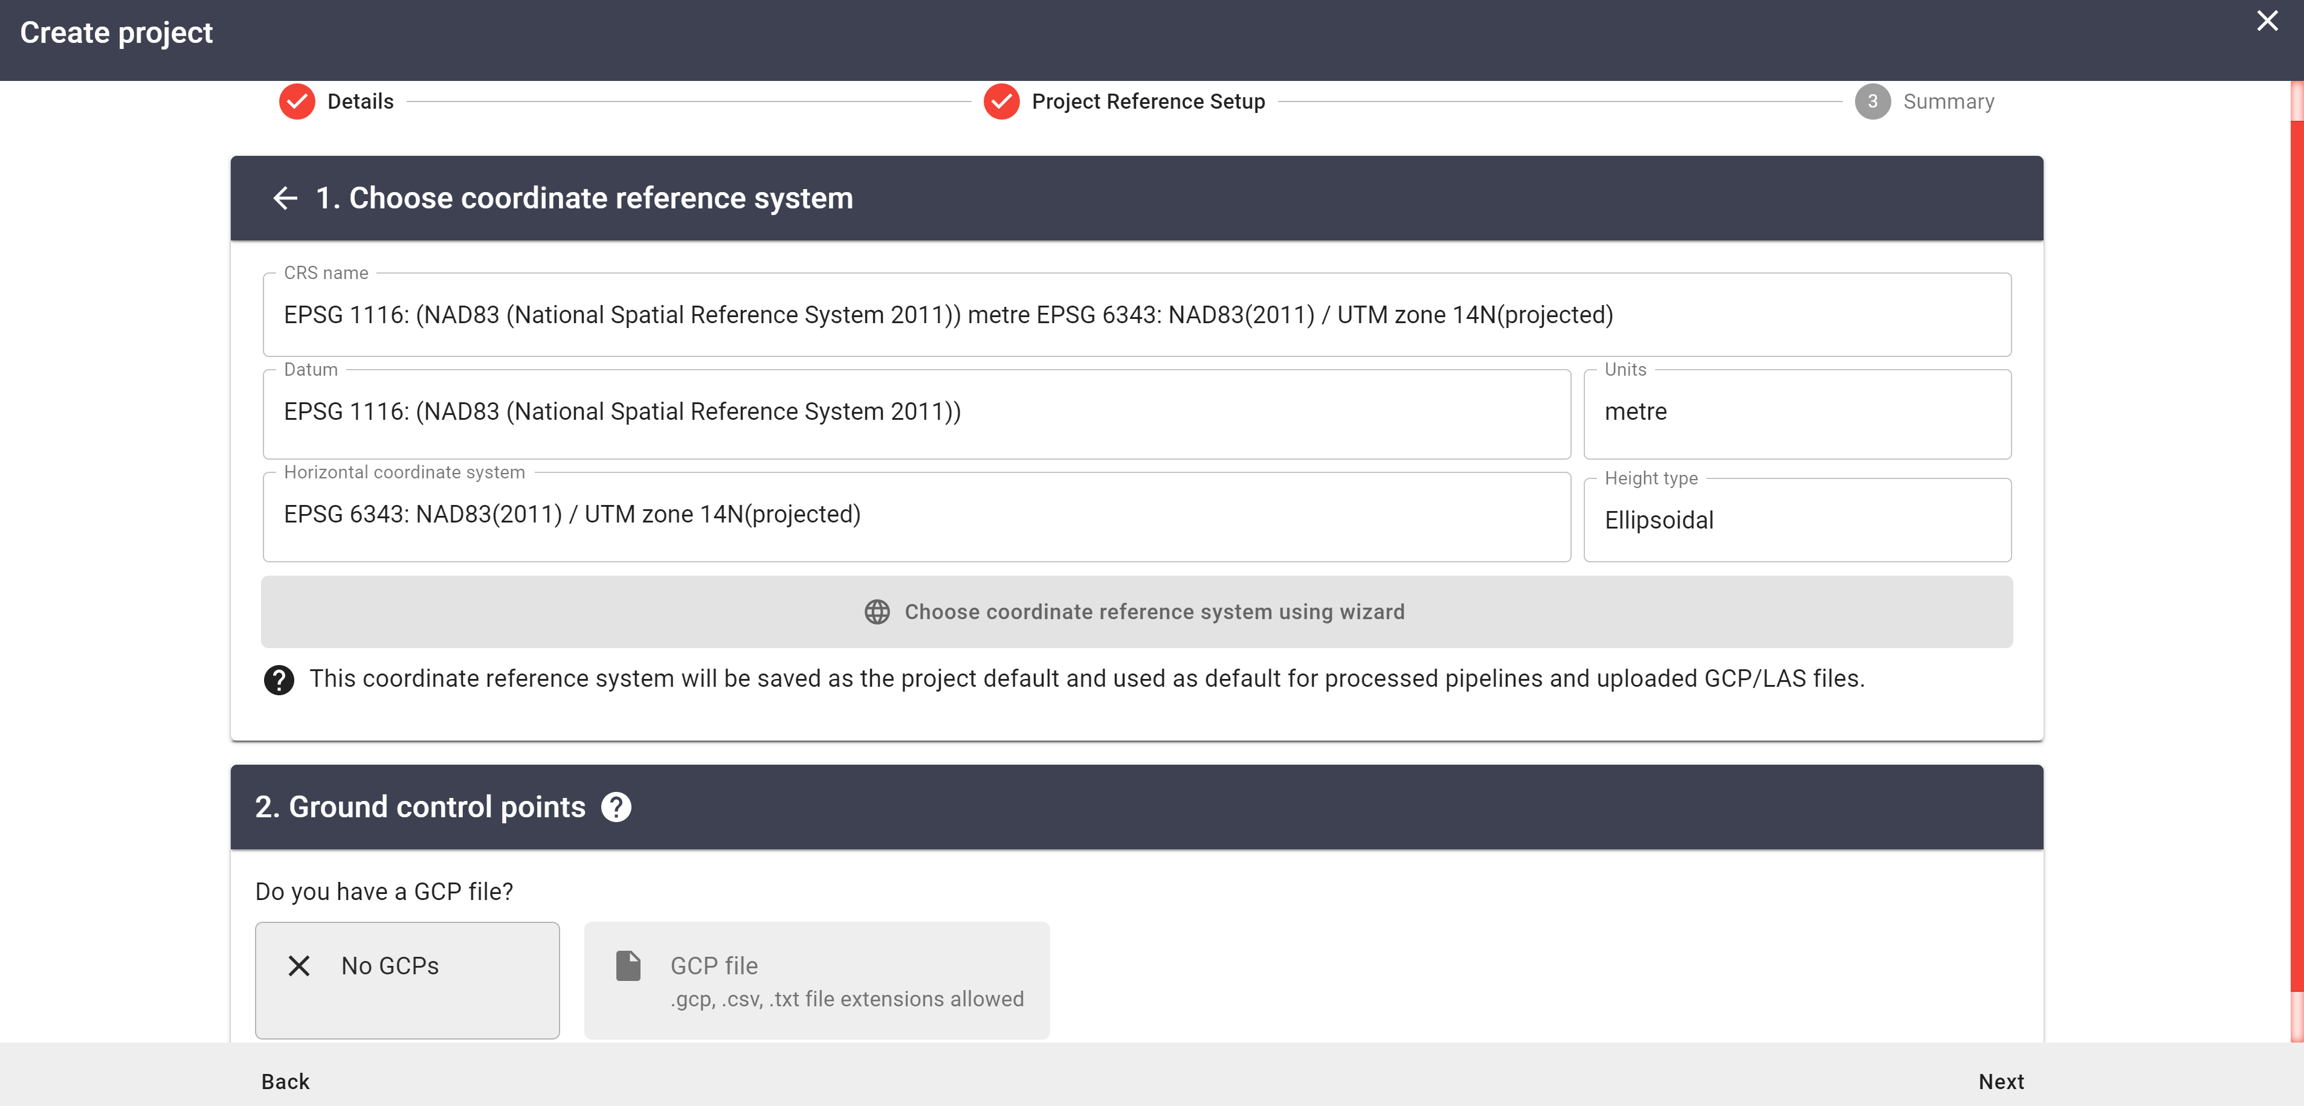
If you DO NOT have GCPs for the project, click the "No GCPs" button, and then click "Next" to continue to the "Summary" tab.
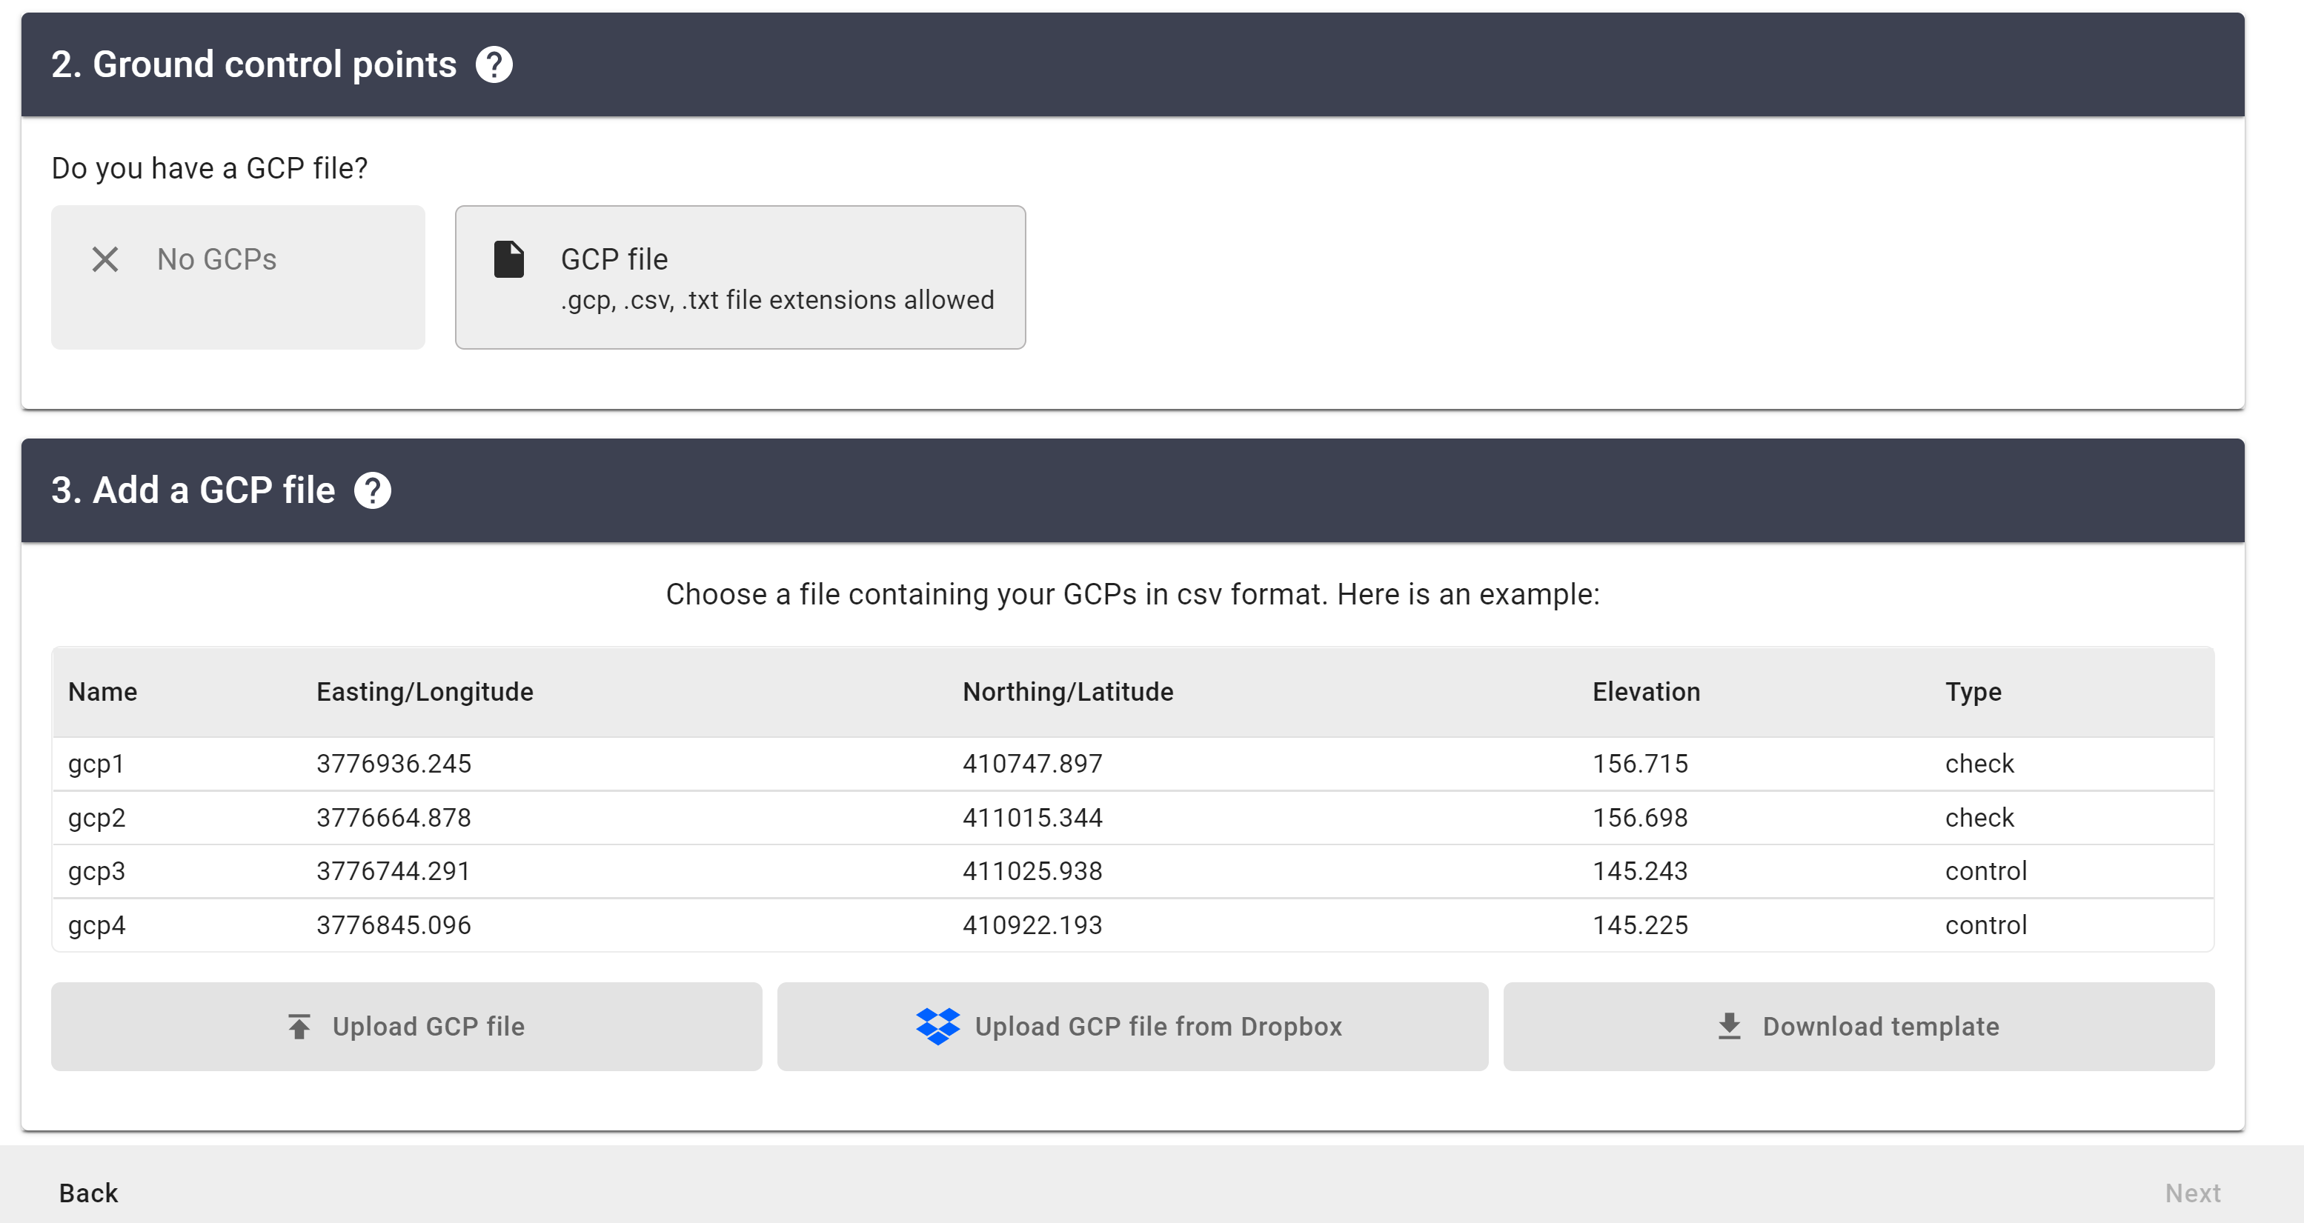
If you DO have GCPs for the project, click the "GCP file" button
LiDAR derived products use surveyed ground points to control and test absolute vertical accuracy. Click here for more information on how to collect and utilize survey ground control.
Import
There are two ways to differentiate high accuracy survey control points - Ground Control Points (GCPs) and Survey Checkpoints (SCPs).
GCPs and SCPs are generally collected at the same time, using the same methodology. GCPs are surveyed control points used for data adjustments, and SCPs are surveyed control points used for accuracy reporting. GCPs utilized for data adjustments should not be used to validate the accuracy of the data product. You can find more information on GCPs and SCPs here.
Click "Upload GCP file" to import GCPs in CSV file format.
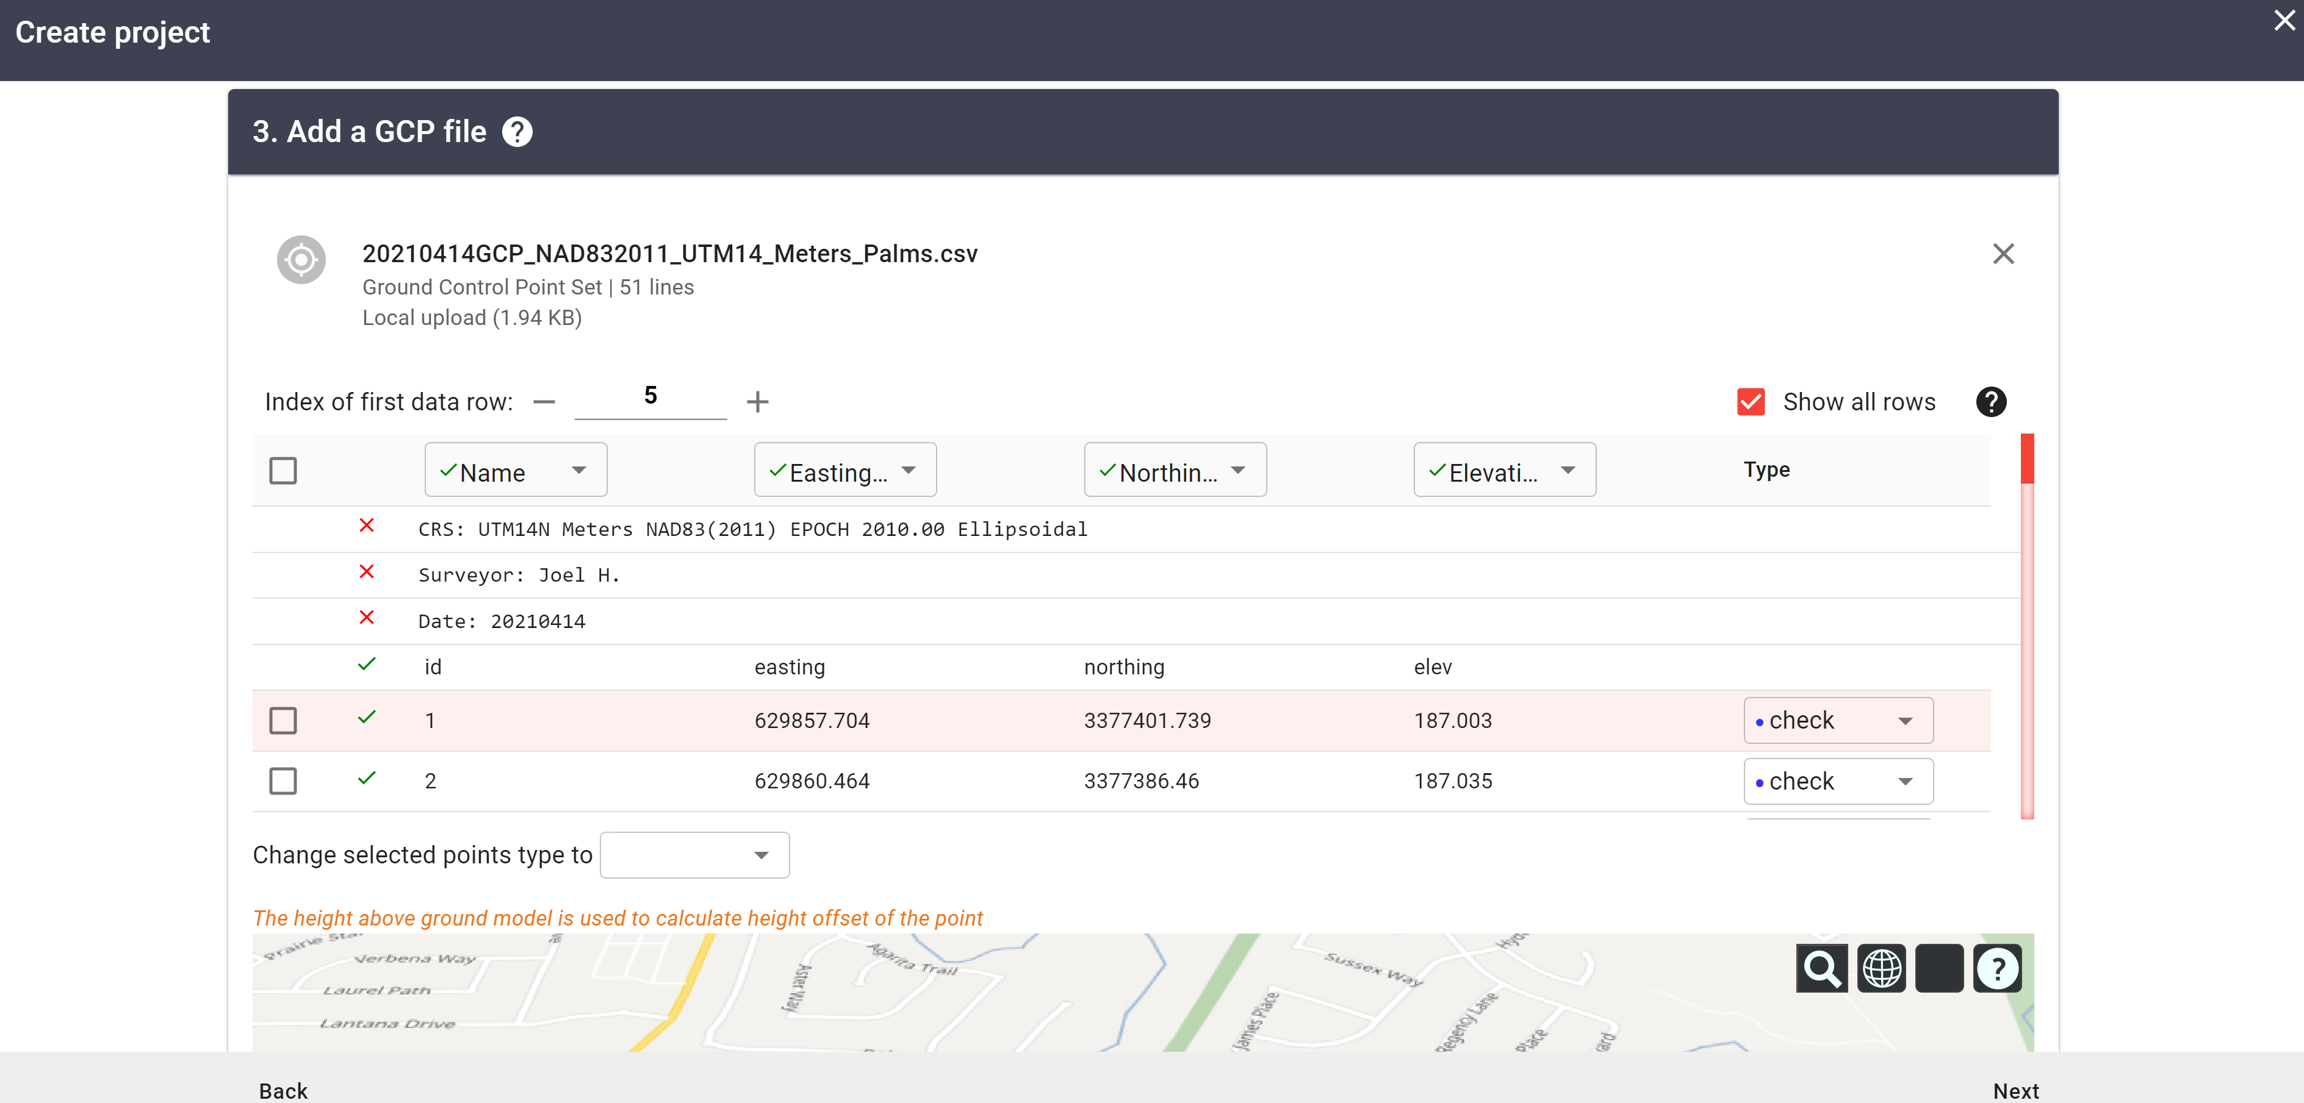
Matching the proper column header to the corresponding data column in the file is the first step in adding a GCP file. Then you select the proper row number under "Index of first data row".
The next step is to denote the "Type" of surveyed point between "control", "checkpoint" and "unused". "Control" is a GCP, where "checkpoint" is an SCP, "unused" points will be ignored during the processing.
Control - GCPs leverage GNSS data to adjust LiDAR and LiDAR derived models in order to improve their overall absolute accuracy. Control points are not used to assess absolute accuracy of the processed pointcloud.
Checkpoint - Survey checkpoints are points with known coordinates that are used to validate the accuracy of the survey. Unlike GCPs, checkpoints do not affect how the survey is processed in any way. All checkpoints are utilized to compute the absolute accuracy of the processed pointcloud.
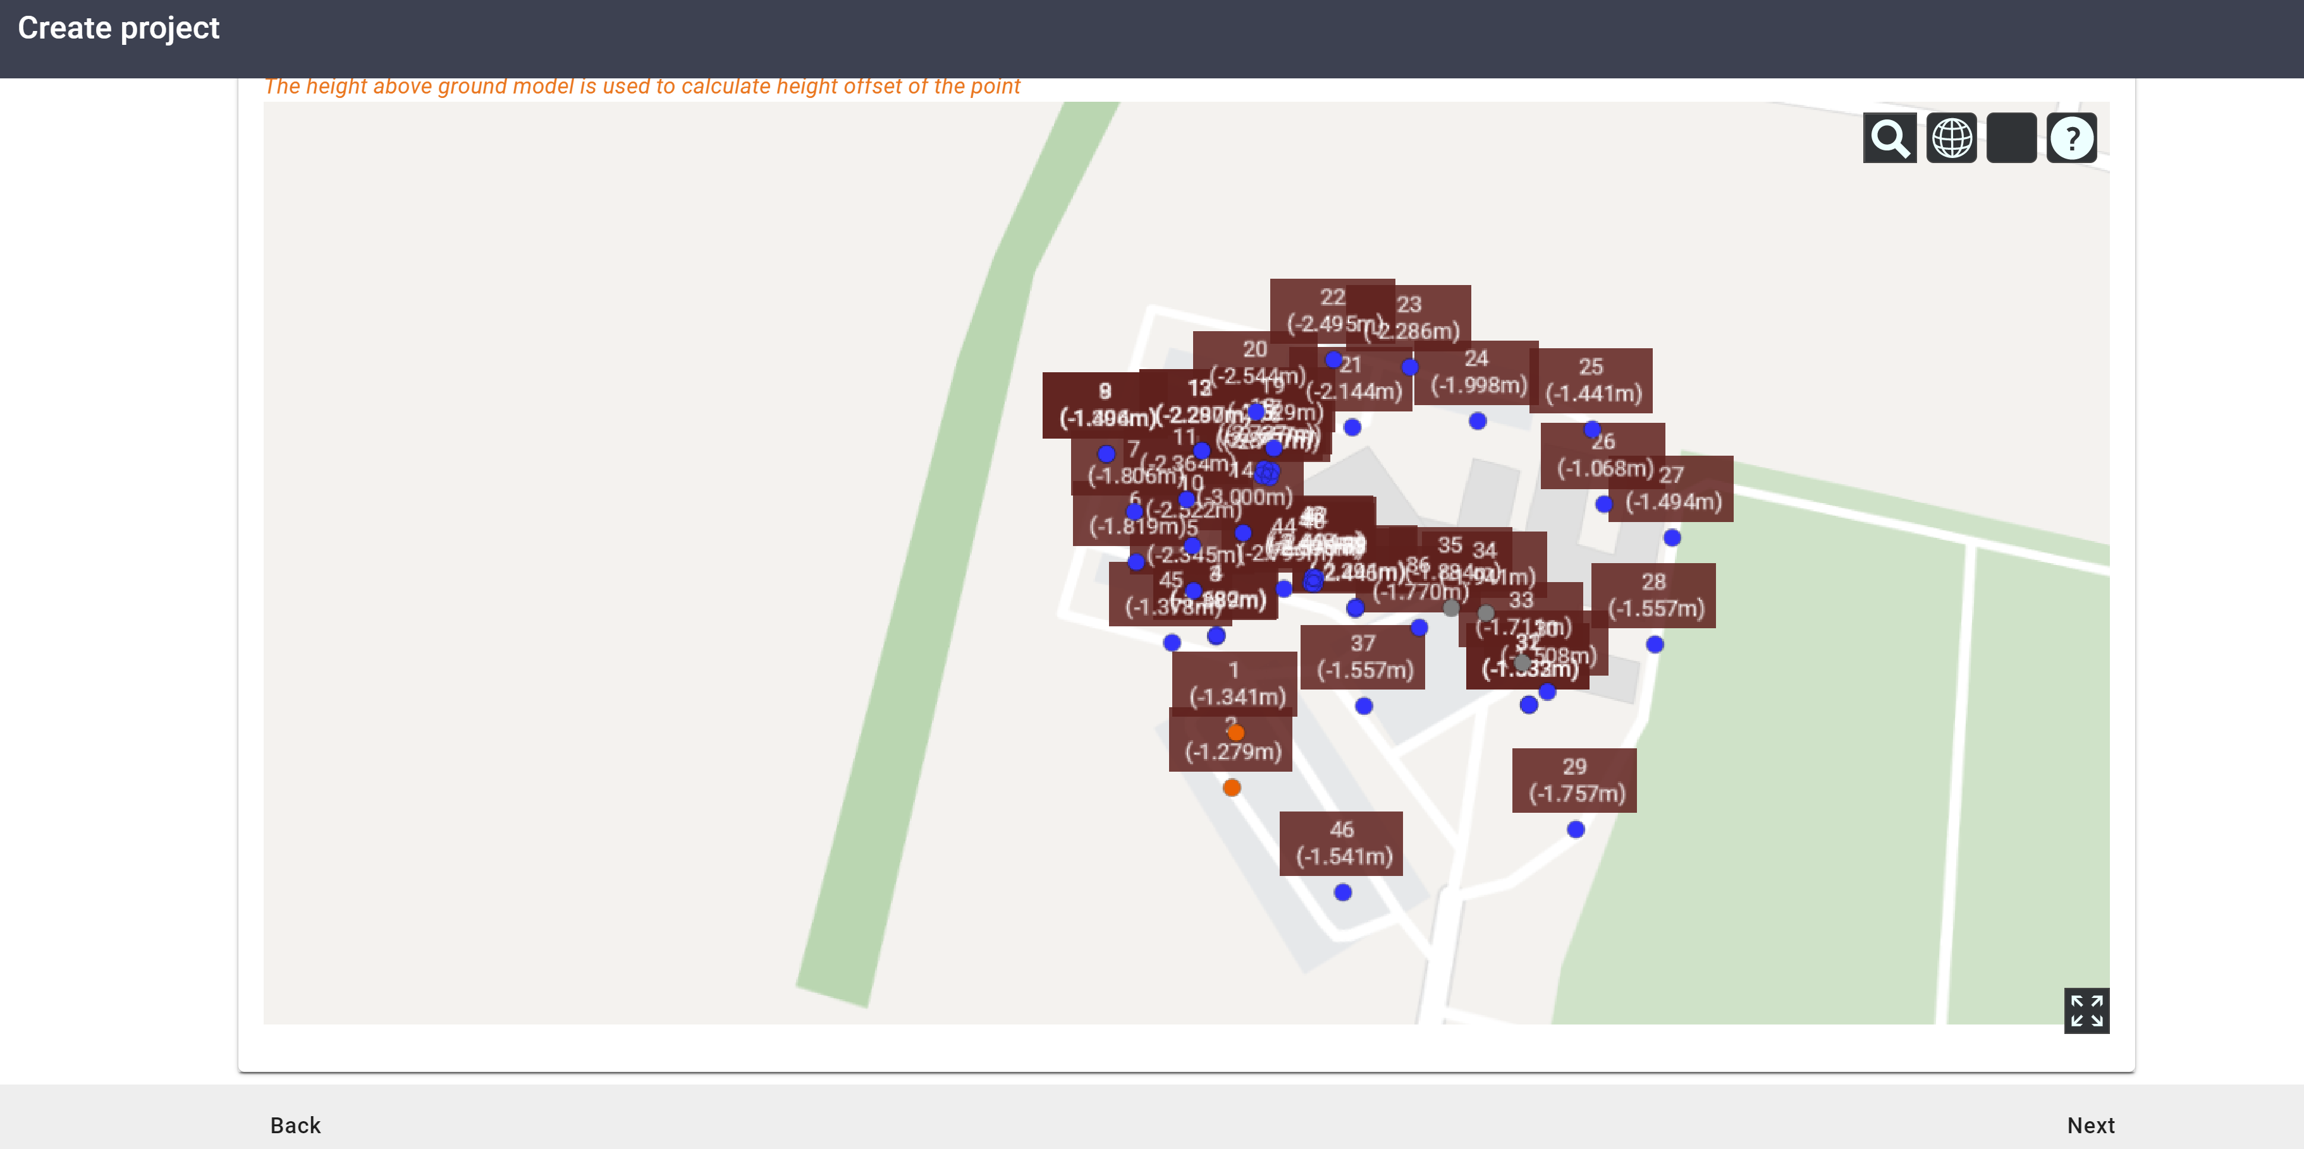
The final step is to review the map at the bottom of the window to verify the input survey control is properly georeferenced. (Note: Disregard stated vertical offsets of GCPs within this map view as it is not referencing your processed LiDAR pointcloud)
Click "Next" when finished.
Last updated