Wired Ethernet Network Card Setup
Any computer with a properly configured ethernet adapter can be used to establish a direct connection to the rover using an ethernet cable. Field computers configured by Phoenix LiDAR Systems will default to an alternative IP configuration of 192.168.200.20 when no IP address is obtained through DHCP on the primary ethernet port within 3 minutes. This will allow a computer to establish a connection to the rover via ethernet after 3 minutes of connection.
The rover's IP address on the primary ethernet interface is 192.168.200.10. Be aware that the rover will NOT act as a DHCP server and assign IP addresses to connected computers. Instead, the connected computer must have a valid IP address in the 192.168.200.* range configured.
The following steps will demonstrate how to configure a Windows 8/10/11 computer with an alternative IP address. This will enable your computer to connect to the rover via ethernet when no IP address is obtained through DHCP on the primary ethernet port within 3 minutes:
1. Open up the Control Panel, click on the Network and Internet category and then click on Network and Sharing Center.
2. Click on “Change adapter settings” located near the top, left-hand side of the window.
3. Locate and identify the primary ethernet adapter in your computer. In this example, the primary ethernet adapter is the “Realtek PCIe GBE Family Controller.”
4. Right-click on the primary ethernet adapter and select “Properties”
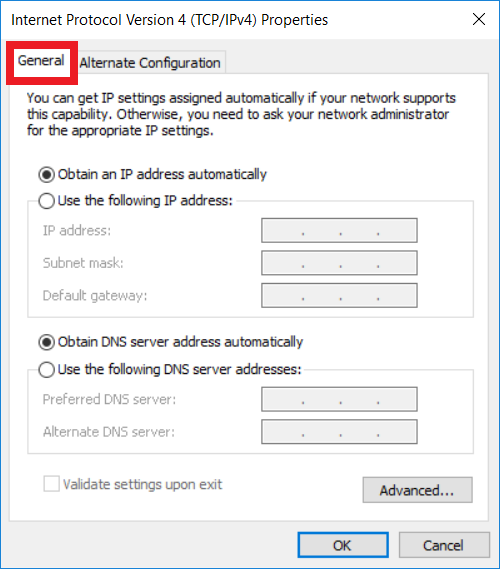
5. Click and select “Internet Protocol Version 4 (TCP/IPv4)” and click on “Properties.”
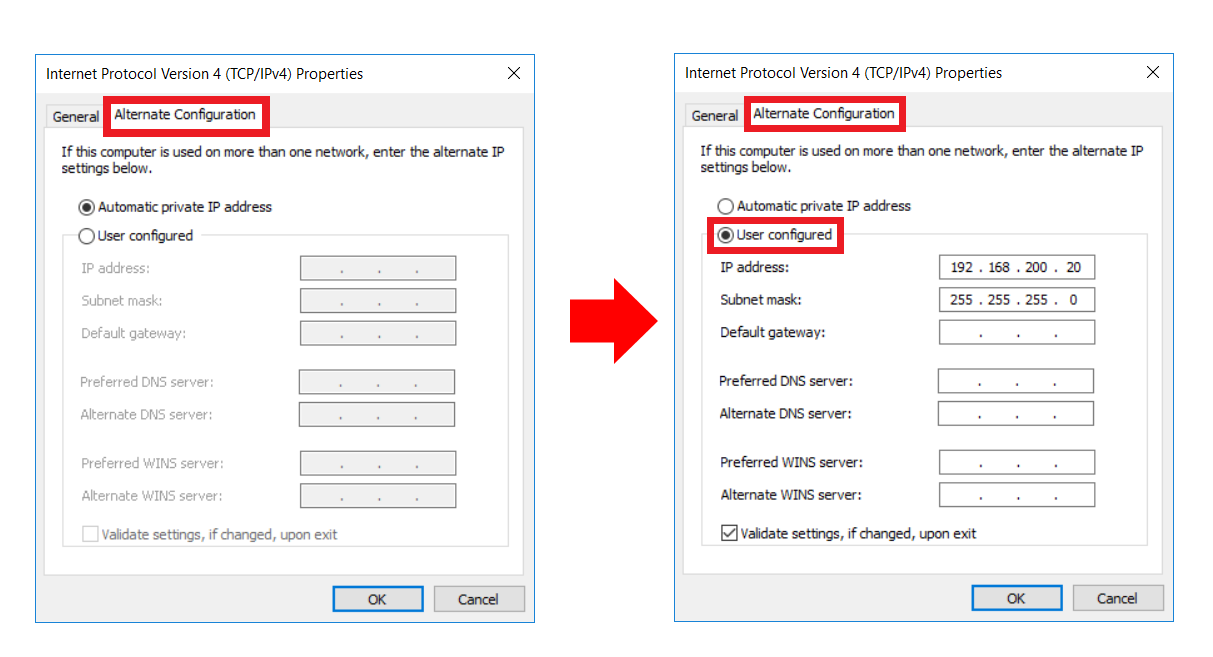
6. Click on the alternate configuration tab and select the “User configured” option. Enter the IP address 192.168.200.20 (for ethernet) or 192.168.101.10 (for M12) in the IP address field box and subnet mask address 255.255.255.0 in the Subnet mask field box.


Wired via ethernet
192.168.200.10
All systems
192.168.200.20
Wi-Fi
192.168.20.10
All systems
Auto via DHCP
Wired via M12
192.168.101.1
Systems designed for helicopter use only
192.168.101.10
When connecting via Wi-Fi, it is not necessary to manually set your computer's IP address.
7. Click “OK” and then “Close” the ethernet adapter properties. Your computer should now have an alternate IP address configured.
8. If you want to test your settings, you can do so by connecting via Connect to Rover or by accessing the rover’s \logs directory. Connect an ethernet cable from rover to your computer. Wait approximately 3 minutes and using a file browser such as File Explorer in Windows (not a web browser), connect to \\192.168.200.10\logs with the username “phoenix” (no quotes) and password “aeriallidar” (no quotes). Alternatively, if you have configured the hosts file as instructed in Modify Hosts File, you can connect to \\rover-wire\logs. Same username and password.
Last updated